I recently built the 1/35 Type 3 Chi-Nu from FineMolds.
The Chi-Nu is one of my favorite Japanese tanks, and I’m also a fan of the Nekonya team from Girls und Panzer, so this project was a lot of fun to work on.
For painting, I used Mr. Color RLM74 Grey-Green as the main tone and finished it with Field Grey to balance the overall color.
The dirt on the tracks was weathered with Tamiya enamel, and I lightly rubbed a 2B pencil on some edges to add a subtle metallic effect.
About the Chi-Nu
The Type 3 Chi-Nu was a late-World War II Japanese medium tank developed in 1943 as a response to the American M4 Sherman.
Due to wartime production limitations, only a small number were built, and they never saw combat.
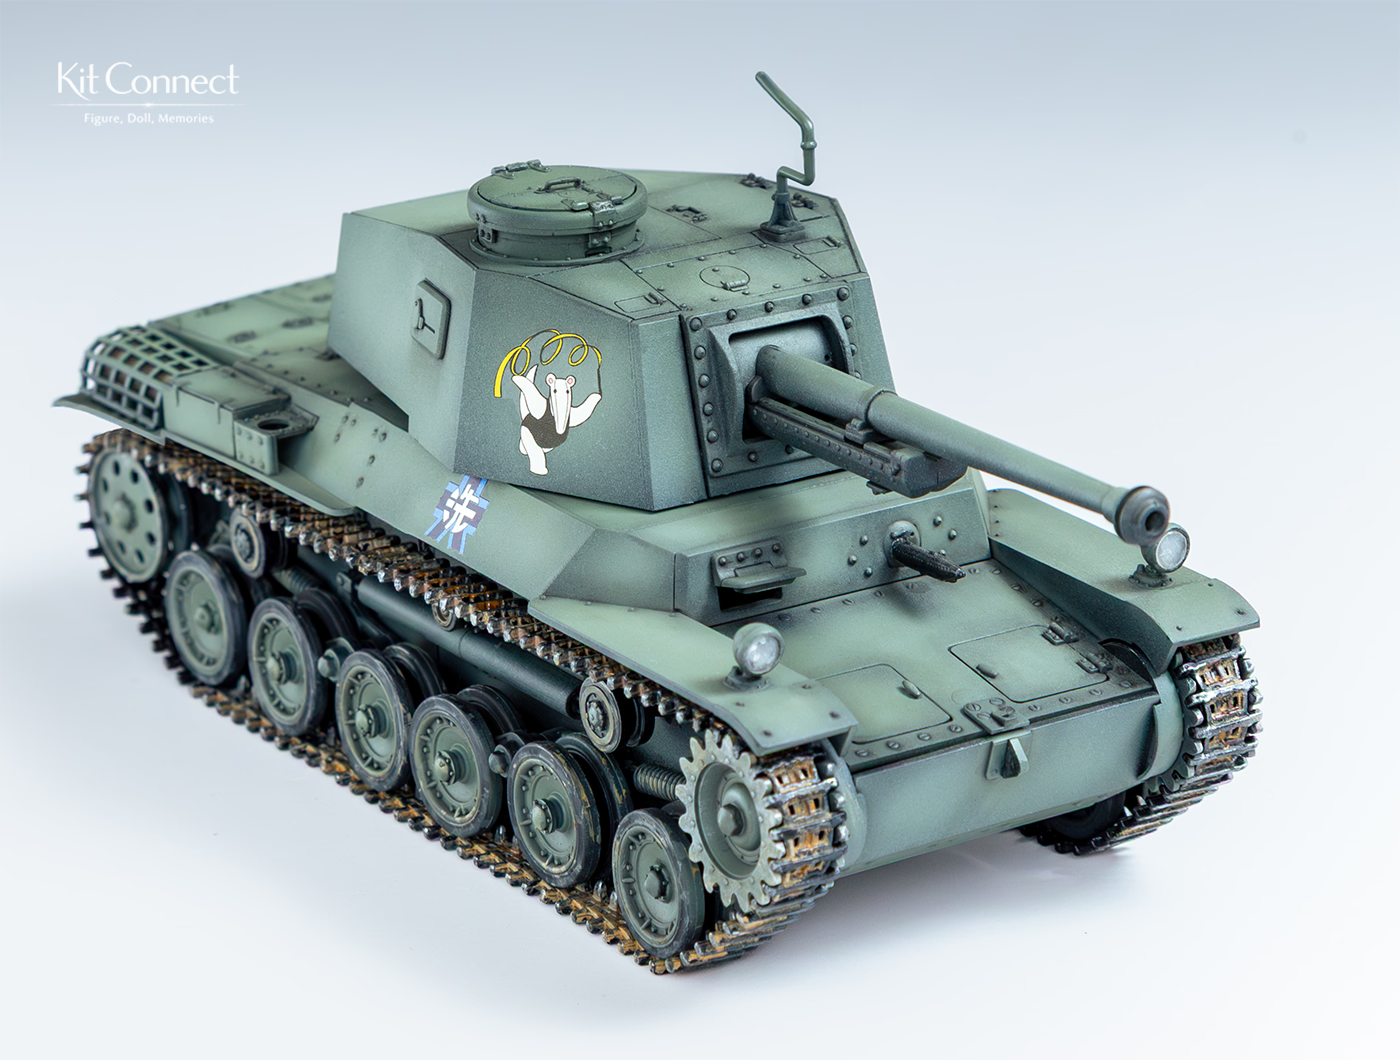
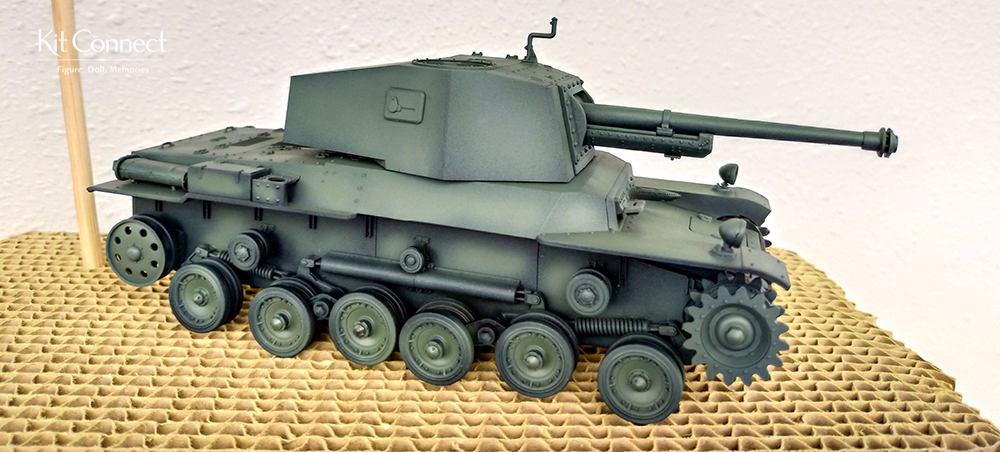
Finished Model
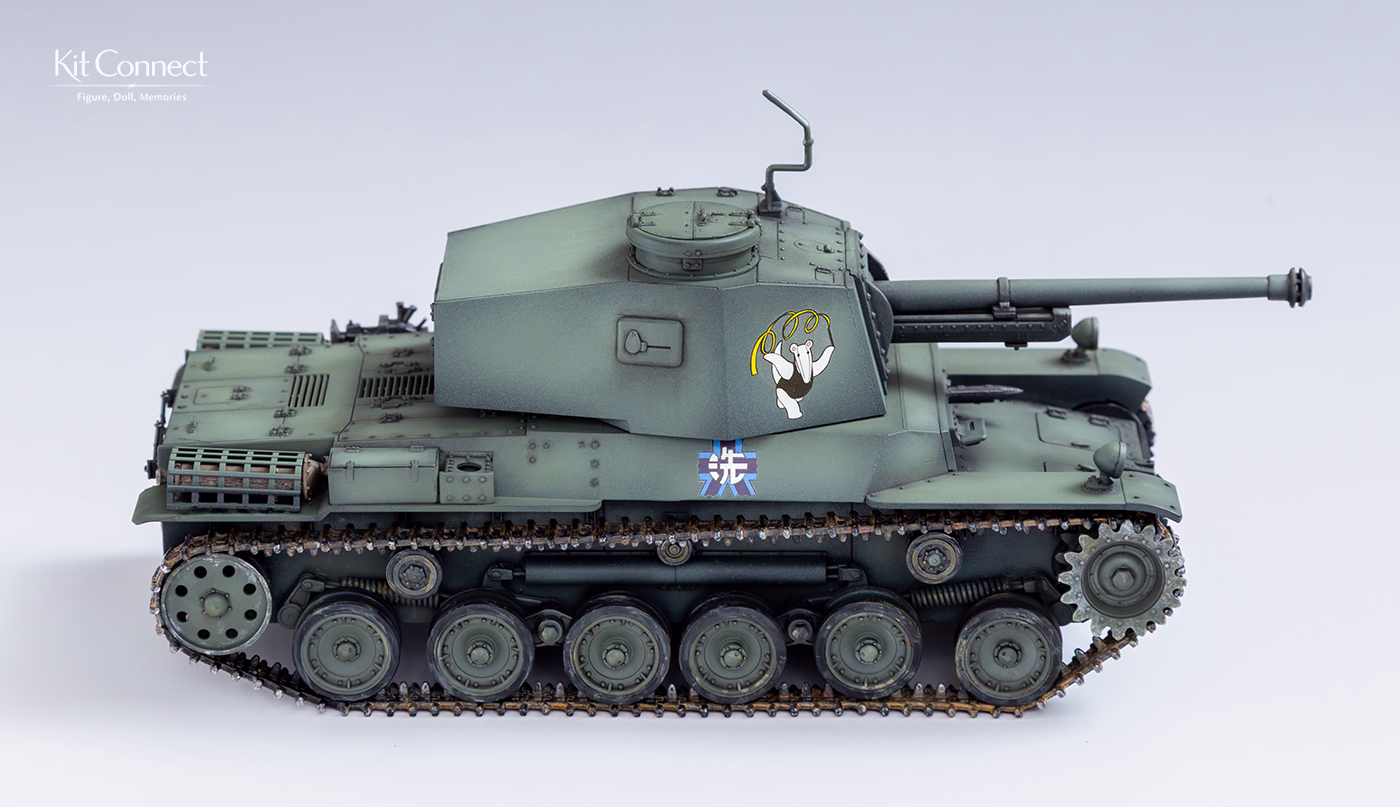
For this build I aimed for a look inspired by Girls und Panzer.
Instead of heavy battle damage, I imagined the tank as one used by a school club — relatively clean, but with some dirt from regular use.
The hull weathering is therefore very subtle.
Most of the dirt is concentrated on the tracks and road wheels, as if the tank had been driving through the sandy terrain around Oarai.
Here are a few photos from different angles.
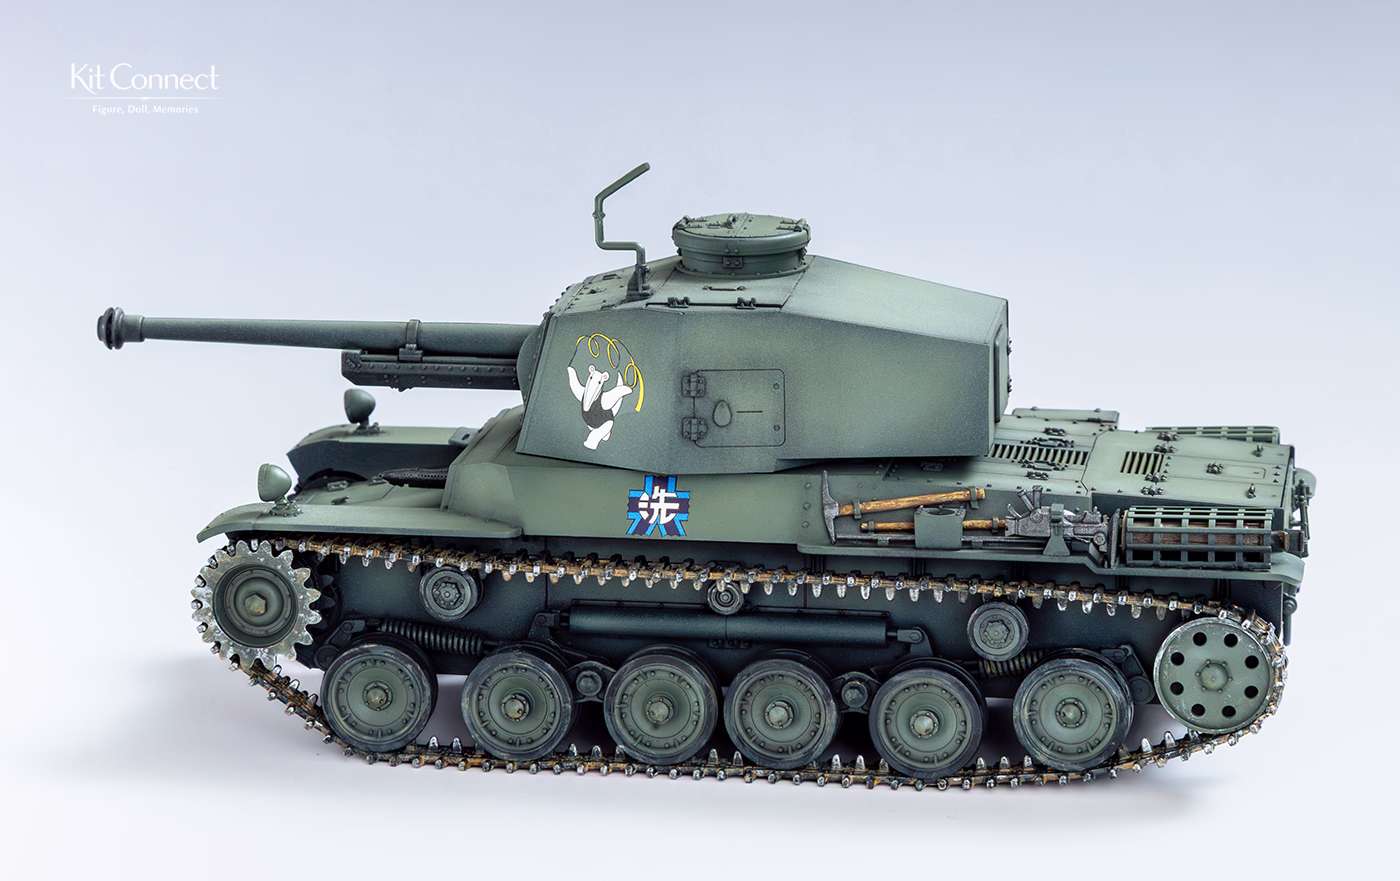

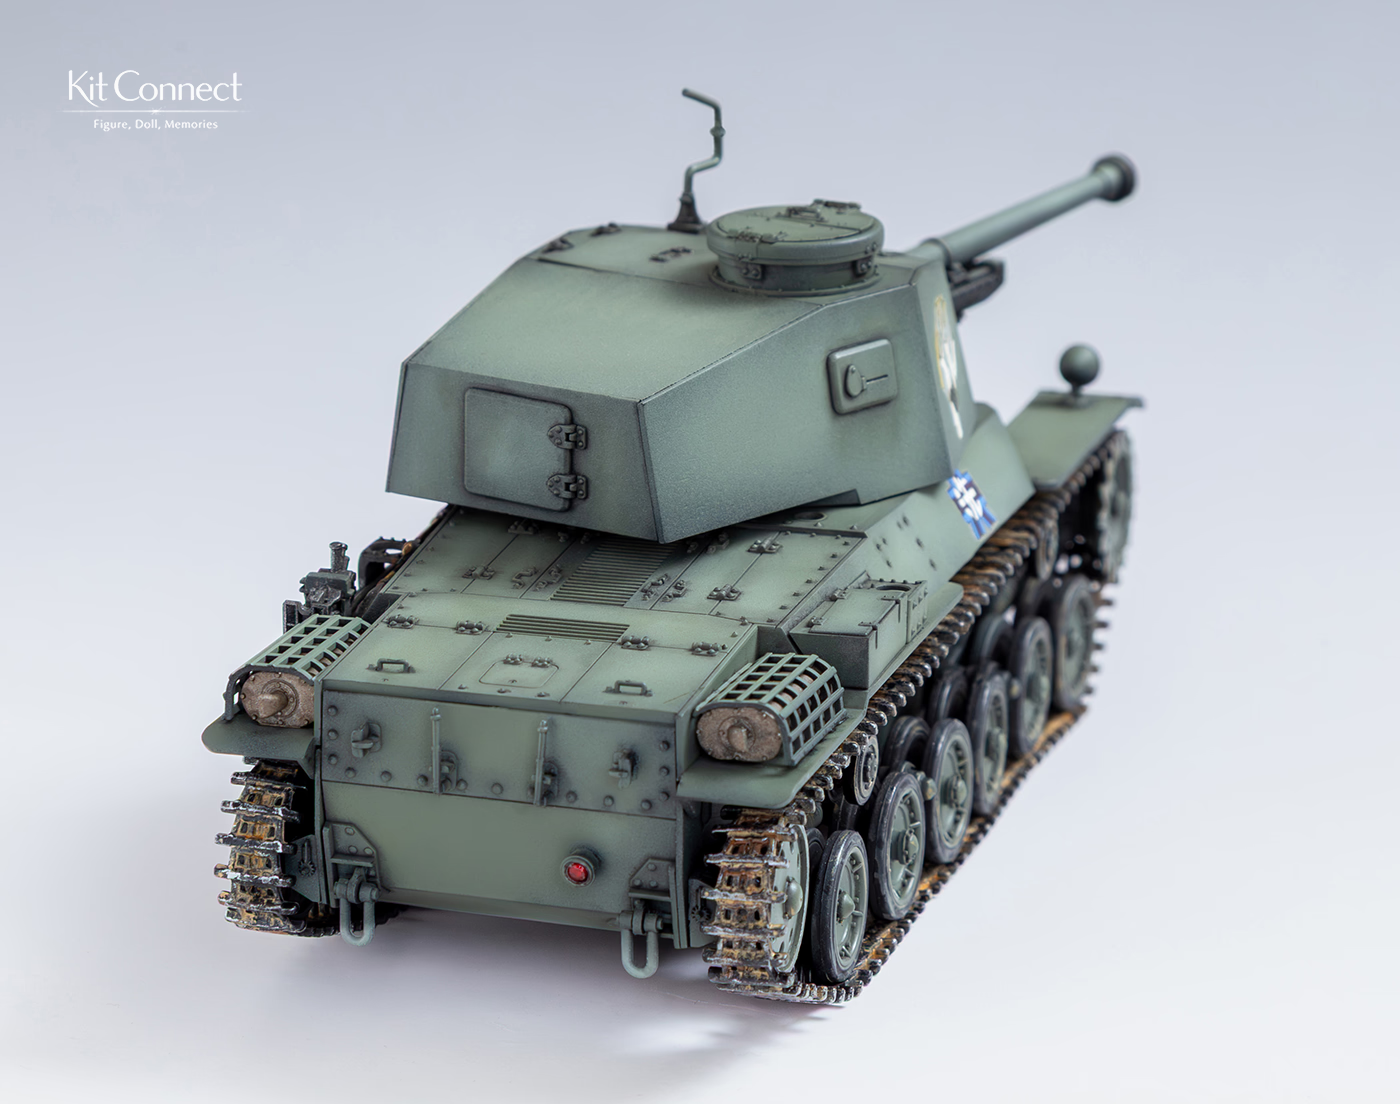
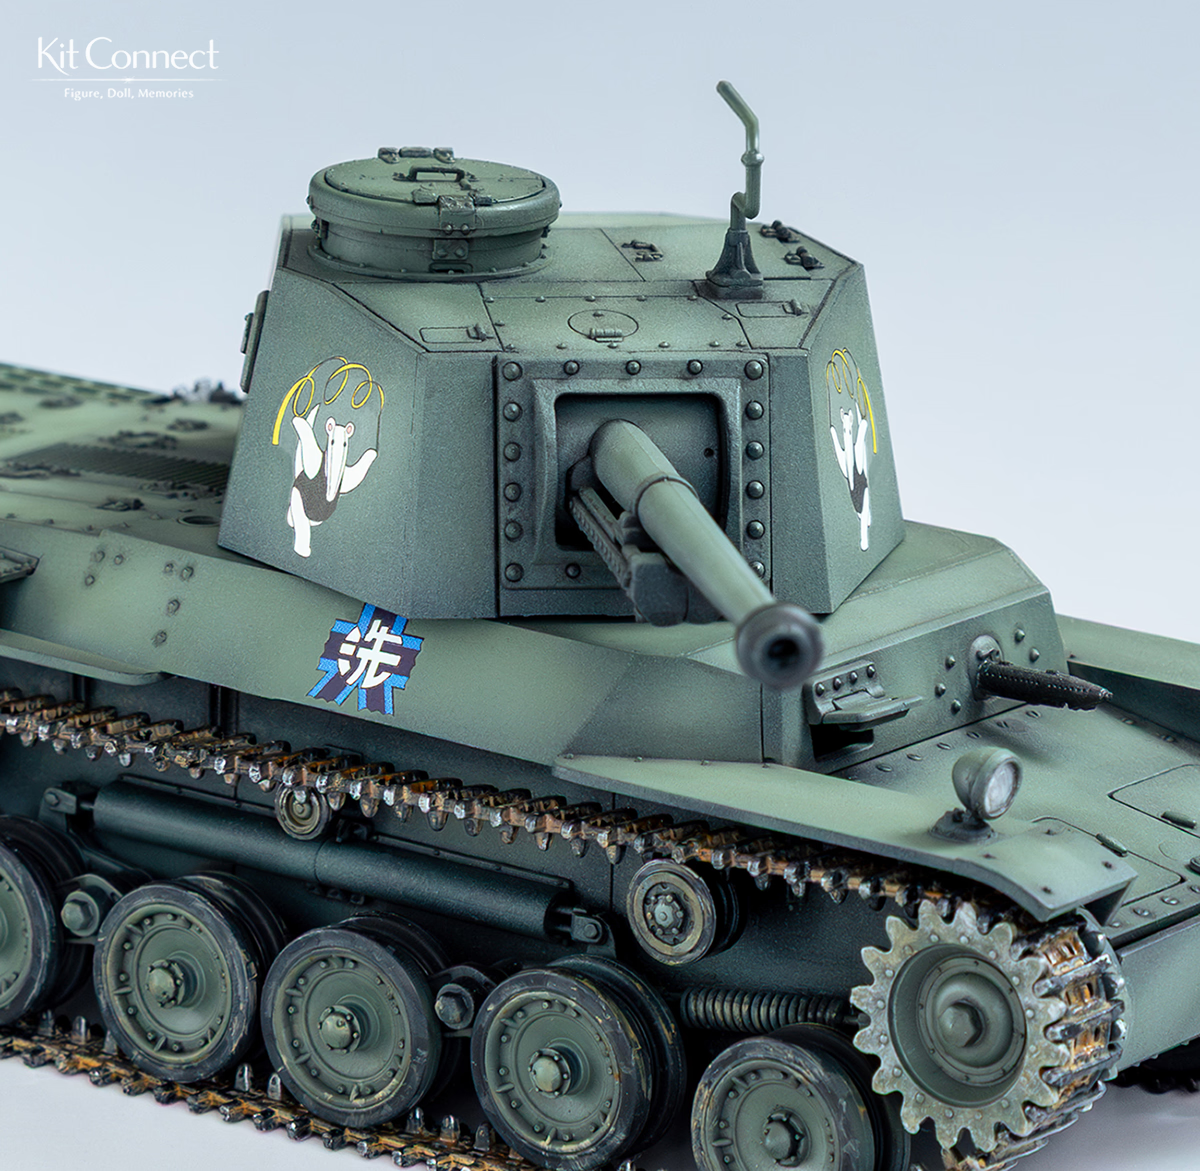
The turret is movable, which makes the model fun to pose.
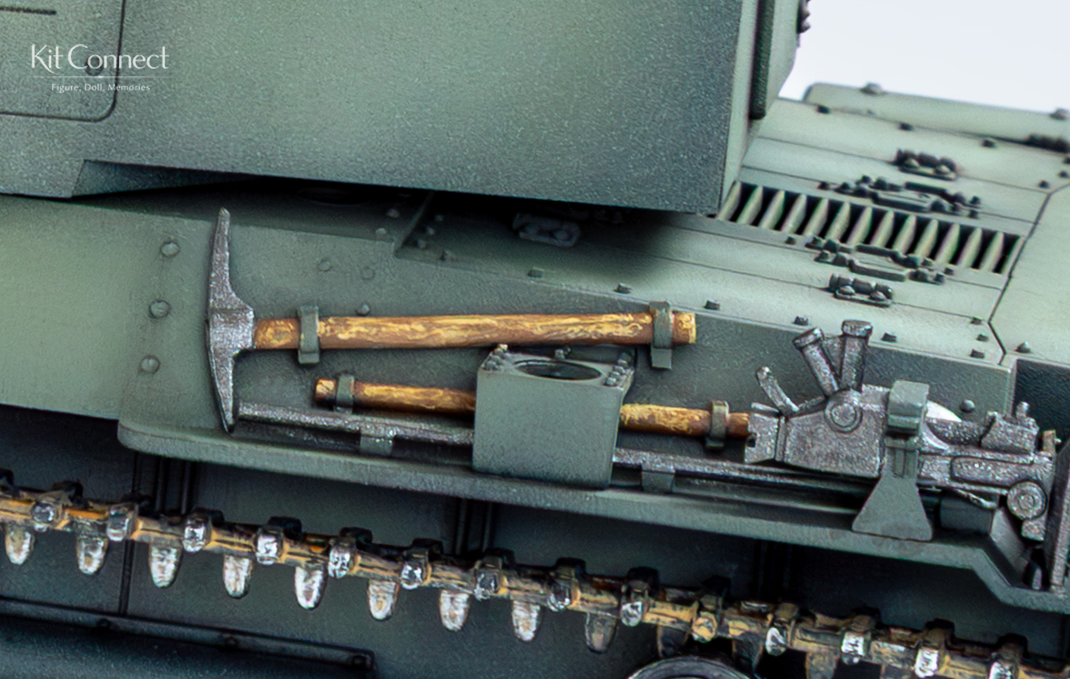
The tools were painted by brush using a dry-brush style to suggest wood grain.
Some of these parts are smaller than a 1-yen coin (~20 mm / 0.8 in), so my eyes were definitely getting tired.
Looking at the photos later, I noticed one of the clamps had come loose — something I completely missed during the build!
Kit Info
Manufacturer: FineMolds
Scale: 1/35
Kit: Type 3 Chi-Nu (Girls und Panzer edition)
The box features artwork of the Anteater (Nekonya) team from the series.
Build Process
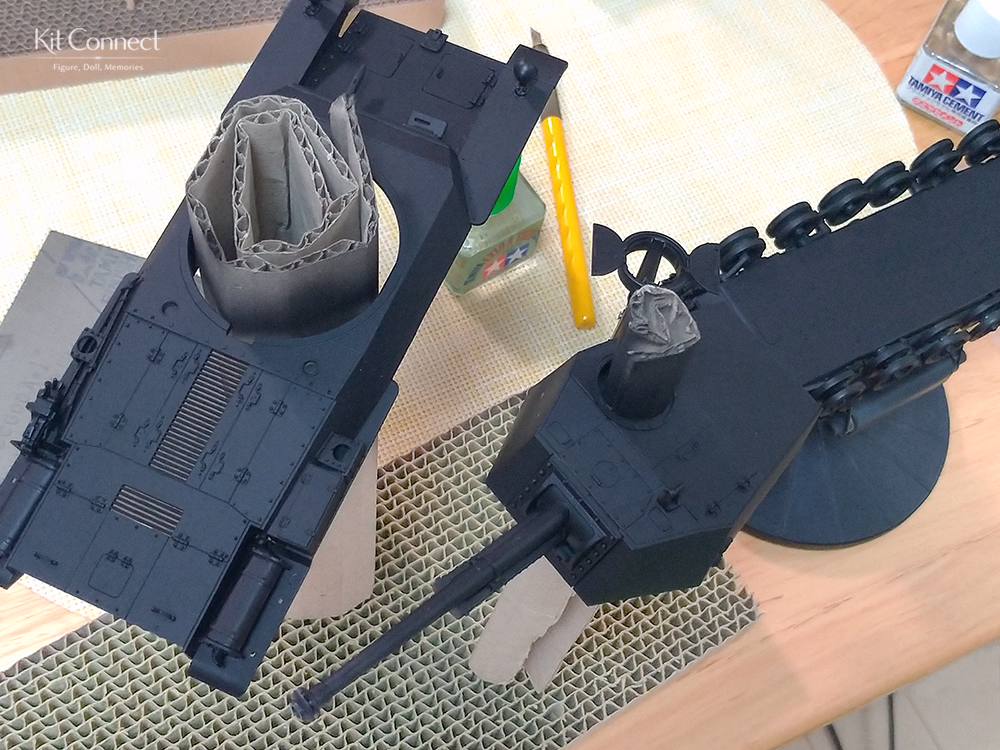
First, I assembled the main parts and sprayed a black primer as the base coat.
Then I lightly built up the main color with RLM74 Grey-Green.
After that, I layered Field Grey to refine the overall tone.
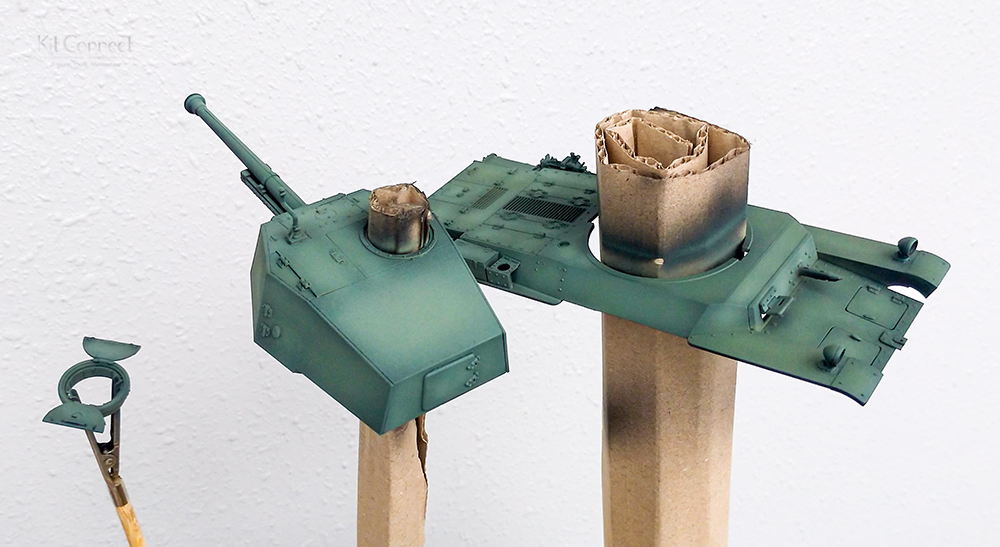
The smaller parts were painted in the same way
(yes… some of this work was done on my balcony).
At one point I accidentally snapped the antenna, so I repaired it using a piece of brass wire.
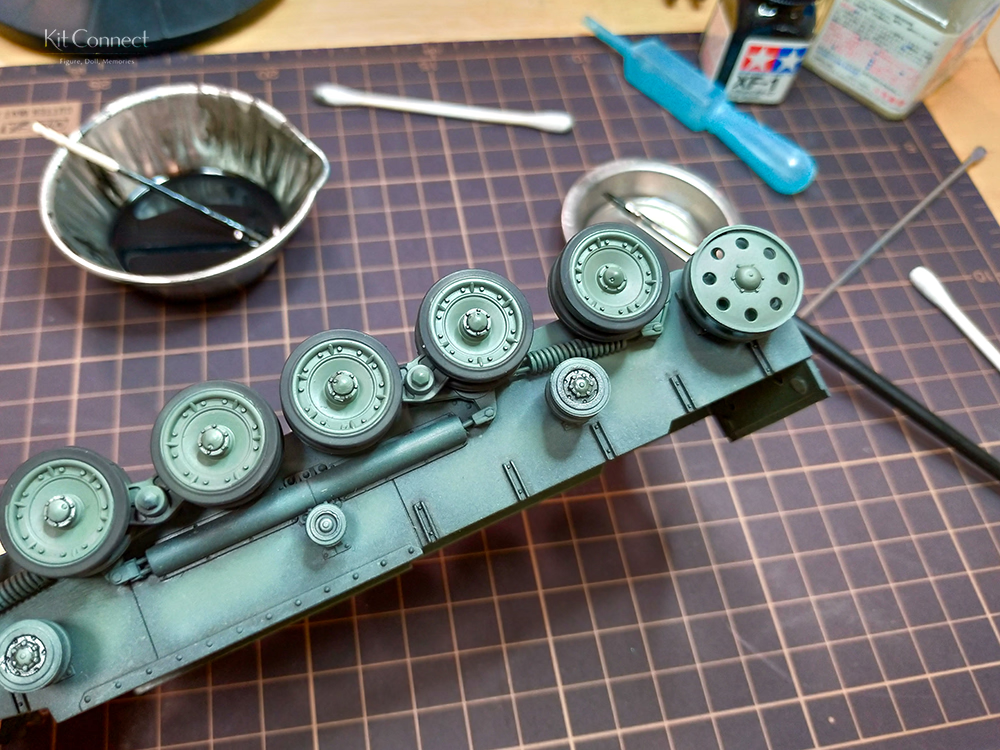
The road wheels were masked and painted separately.
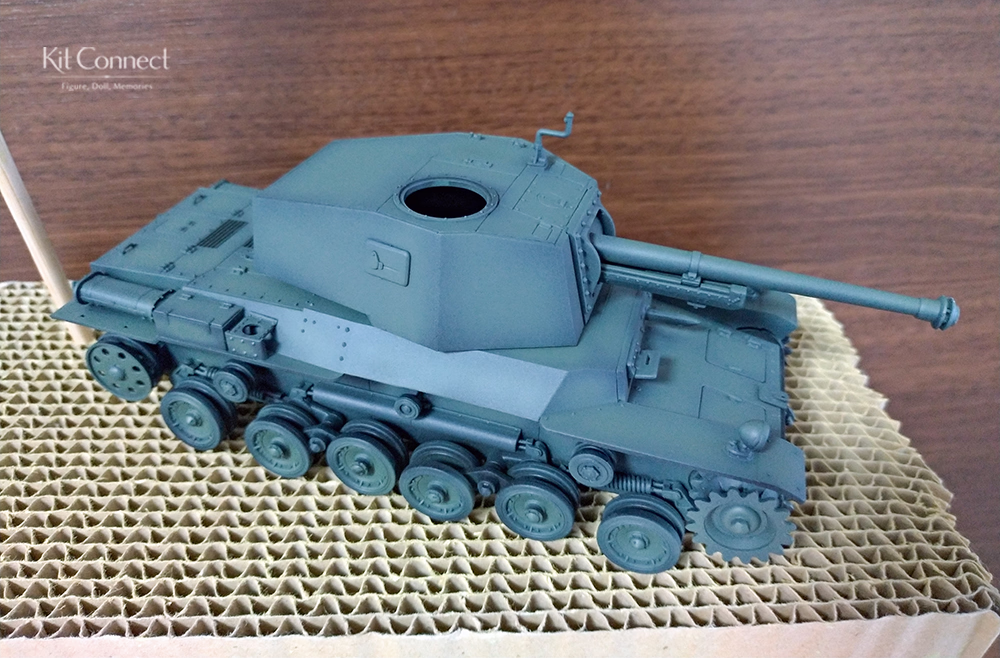
Finally I painted the small details by hand and applied a panel wash to bring out the details.
The last step was enamel weathering around the tracks.
Ironically, that was the most fun part — and I got so absorbed that I forgot to take photos!
Tanks Are Fun

This was my first time painting a tank model, and I really enjoyed the process.
Sometimes the paint goes slightly outside the lines, but those little imperfections can create unexpected charm.
Moments like that are part of what makes scale modeling so enjoyable.
Taking photos of the finished model also revealed things I didn’t notice while working. The decal gloss, for example, wasn’t very noticeable to the naked eye, but it stood out more in the photos.
Next time I’d like to:
- Reduce decal gloss
- Apply a clear coat to blend the decals into the surface
- Use a higher f-stop so the entire tank stays in focus
Finding these small improvements is part of the fun. I’m looking forward to trying again and pushing the result a little further next time.
This Chi-Nu also made a small “homecoming” trip to Oarai, the setting of Girls und Panzer.
I’ll share that trip in the next post!