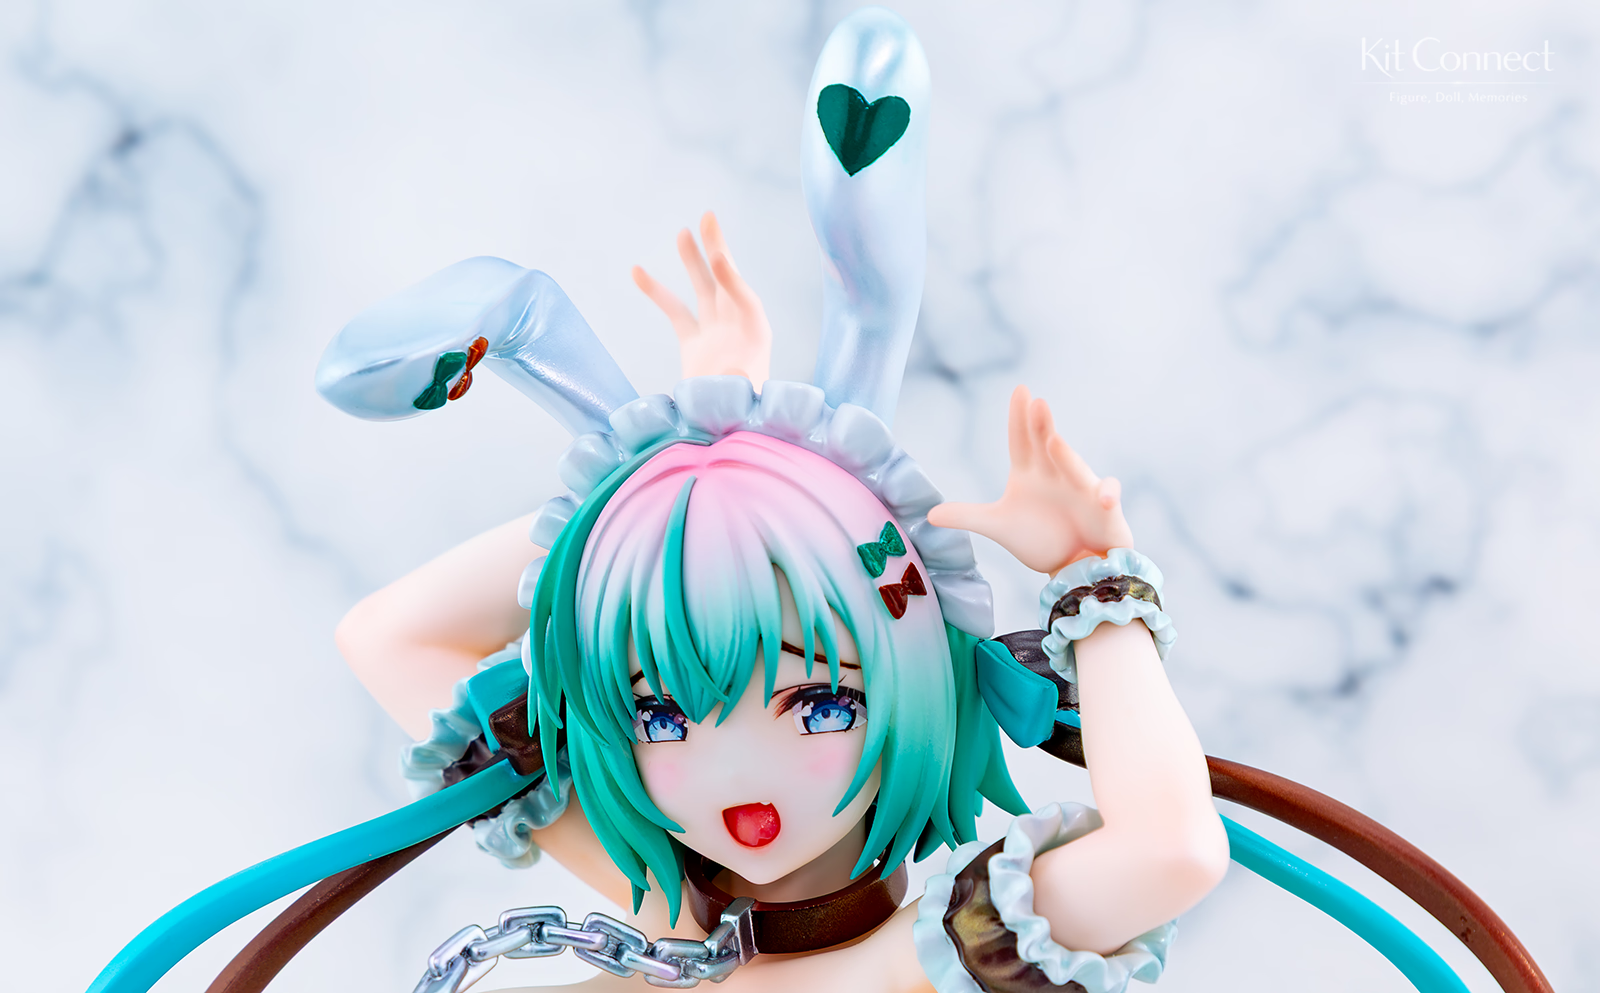
My First Grizzly Panda Kit
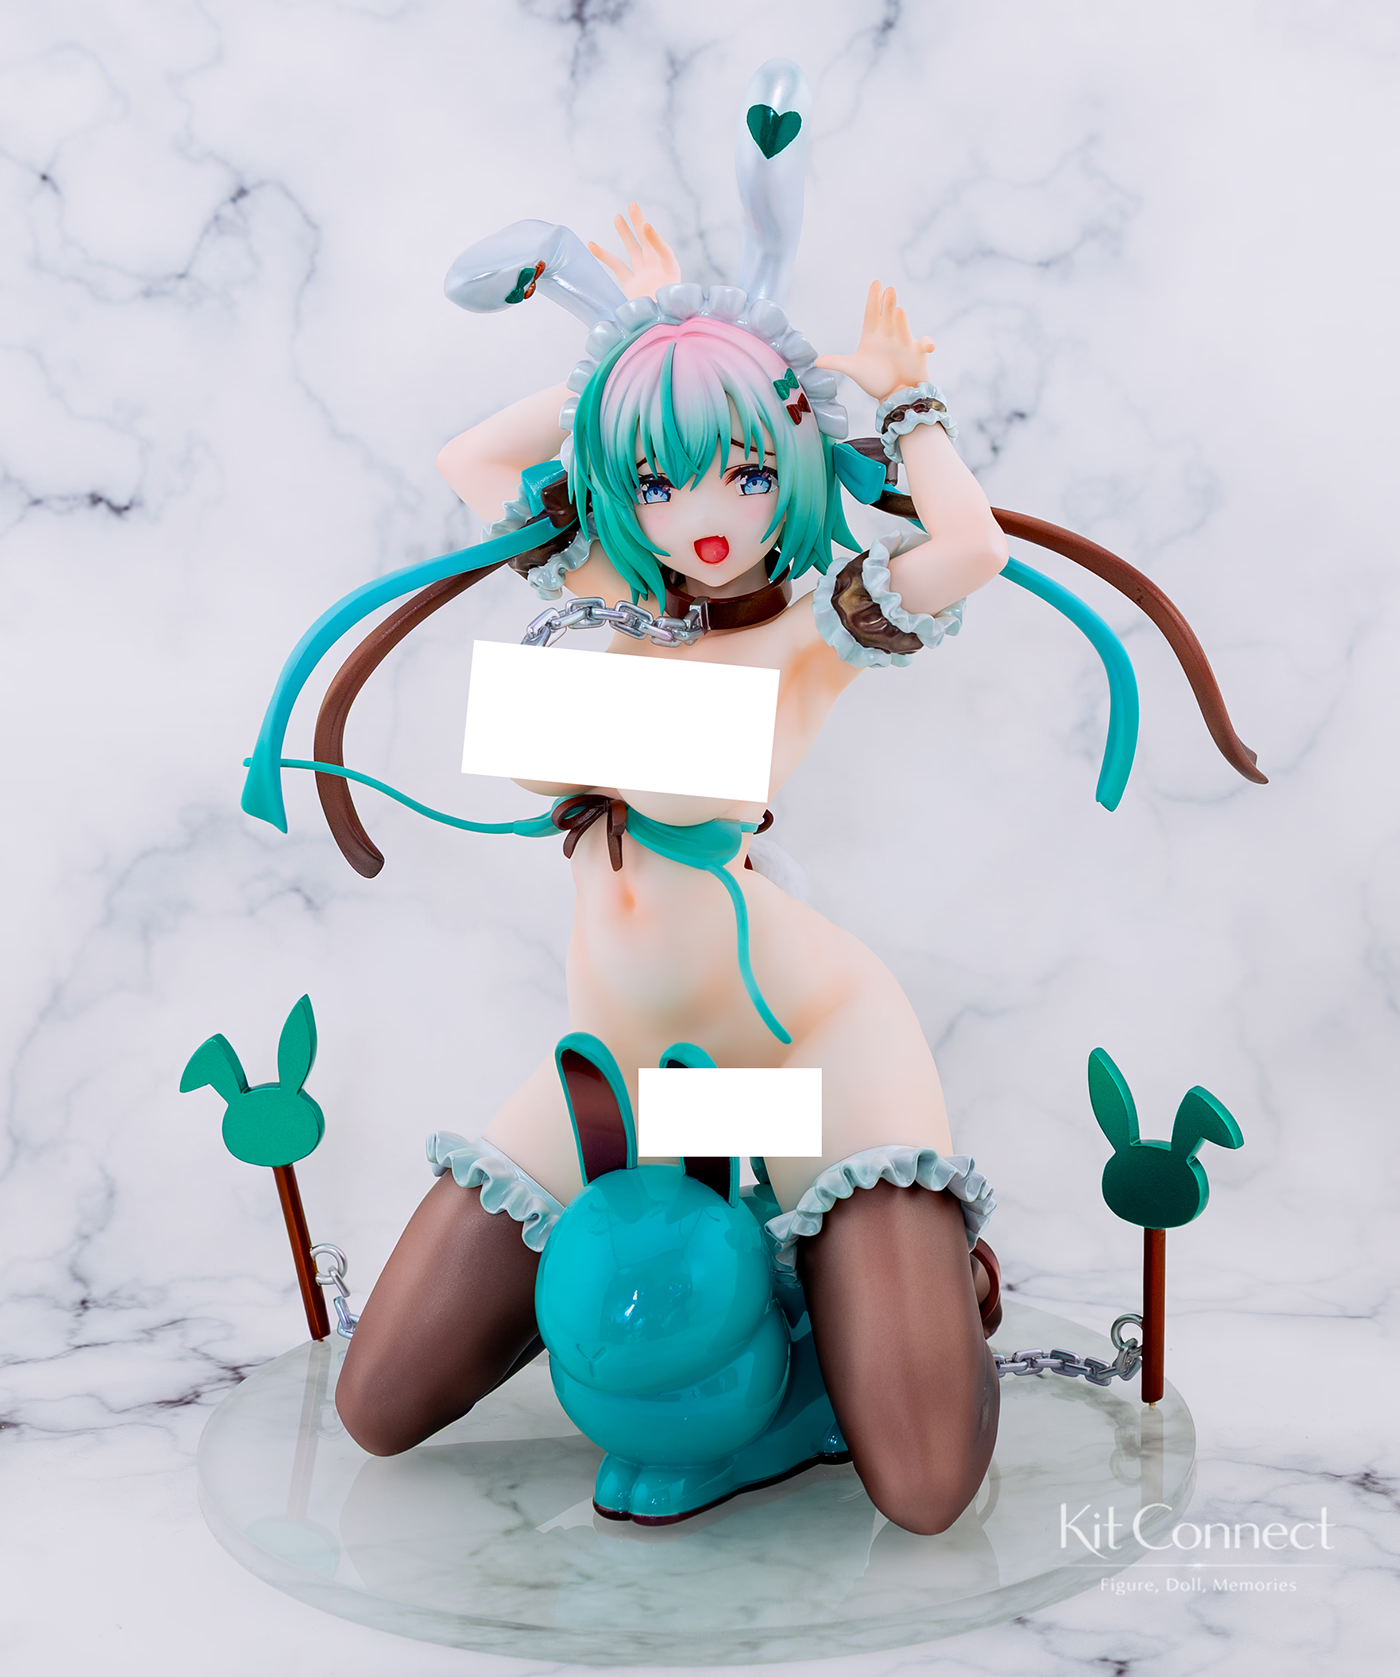
I was immediately drawn to this kit’s beautiful body sculpting.
The pose and expression are adorable, too.
That combination of beauty and cuteness was what sold me on the kit.
This was my first Grizzly Panda kit. I bought it six years ago—and then left it on the shelf for six years. 😅
I finally started building it when I decided to attend a garage kit exhibition. It was great to get back into a kit with this much energy.
After six years, she is finally finished. A very special one for me.
Contents
Finished Photos
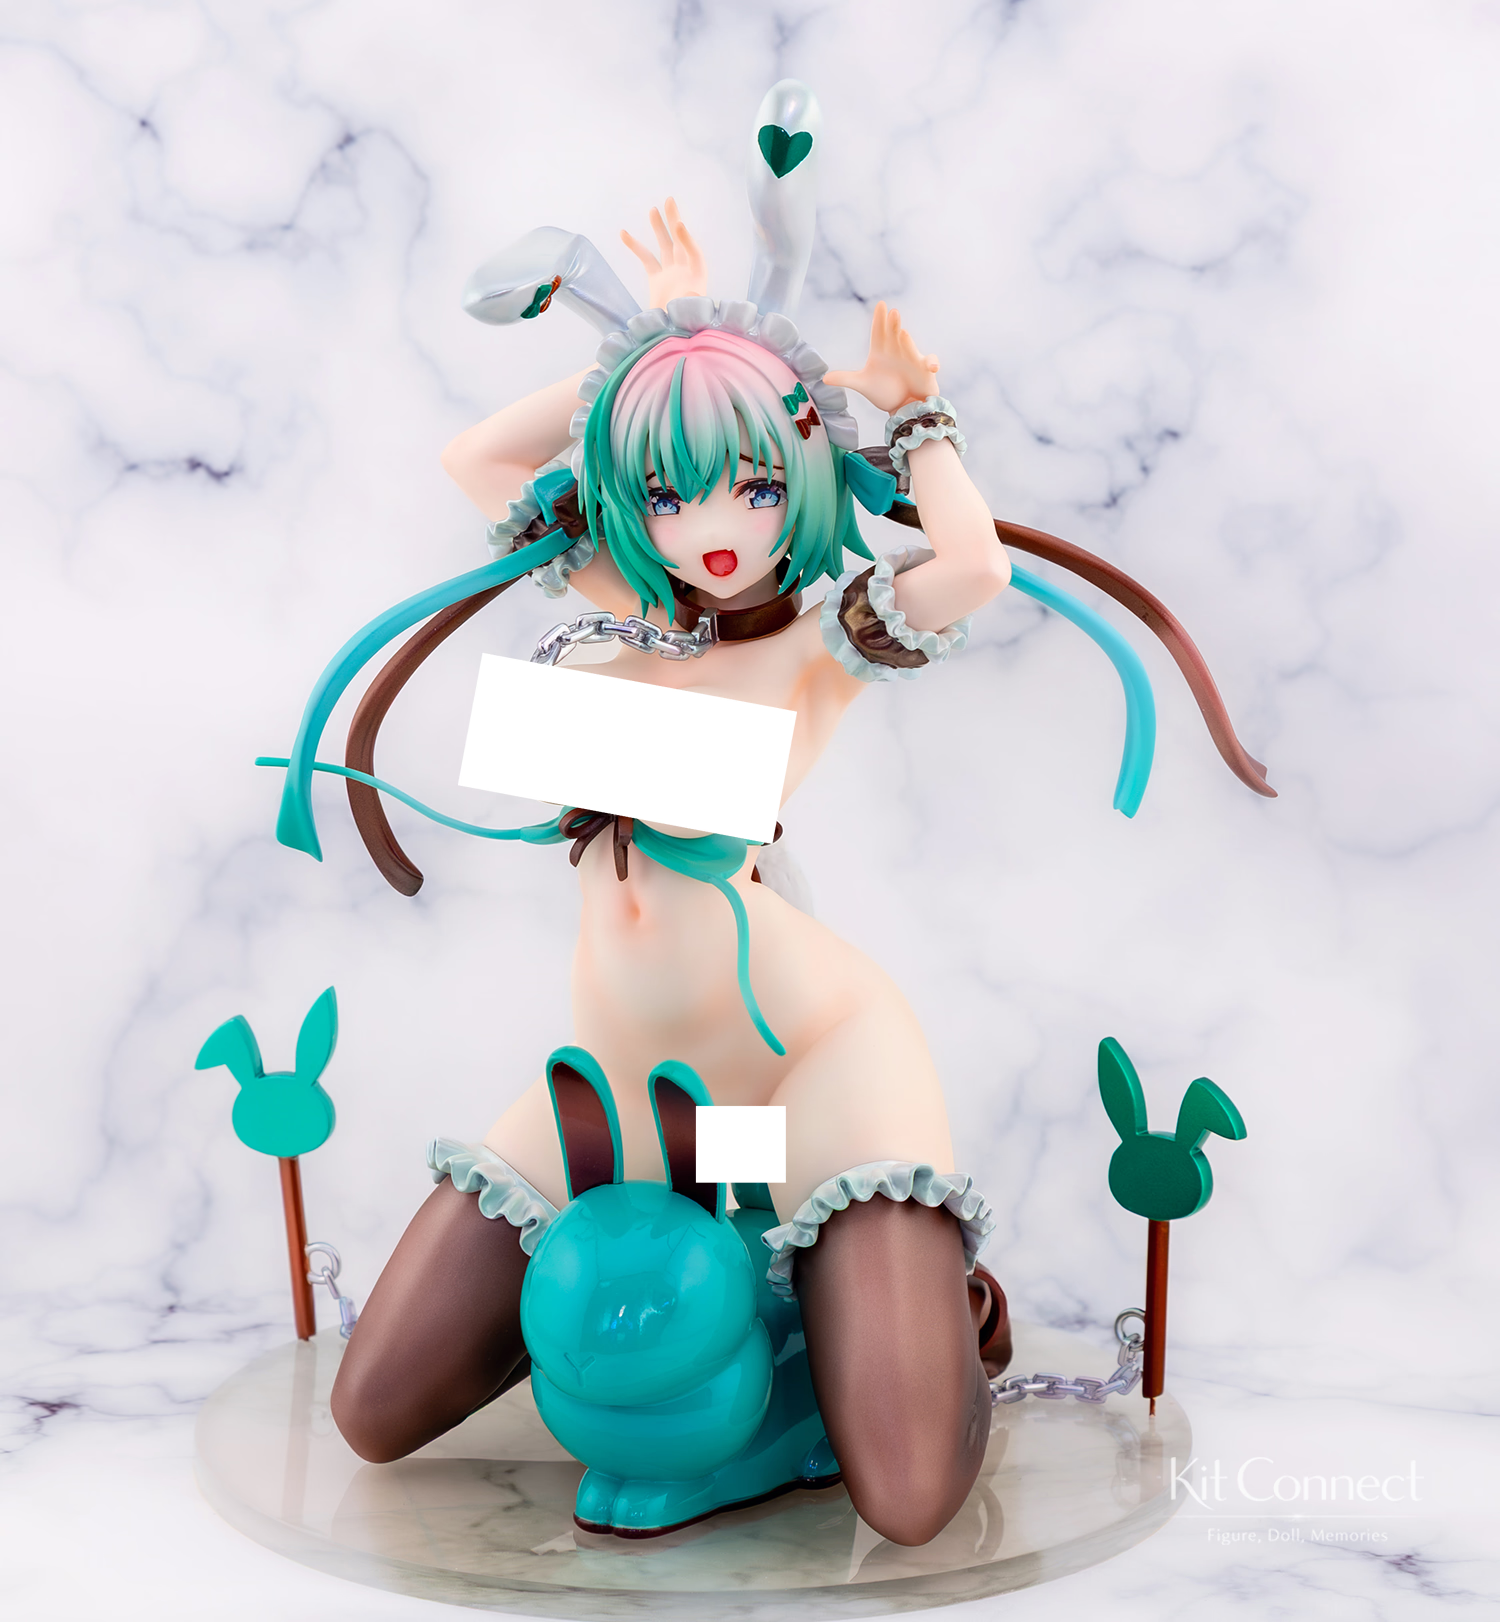
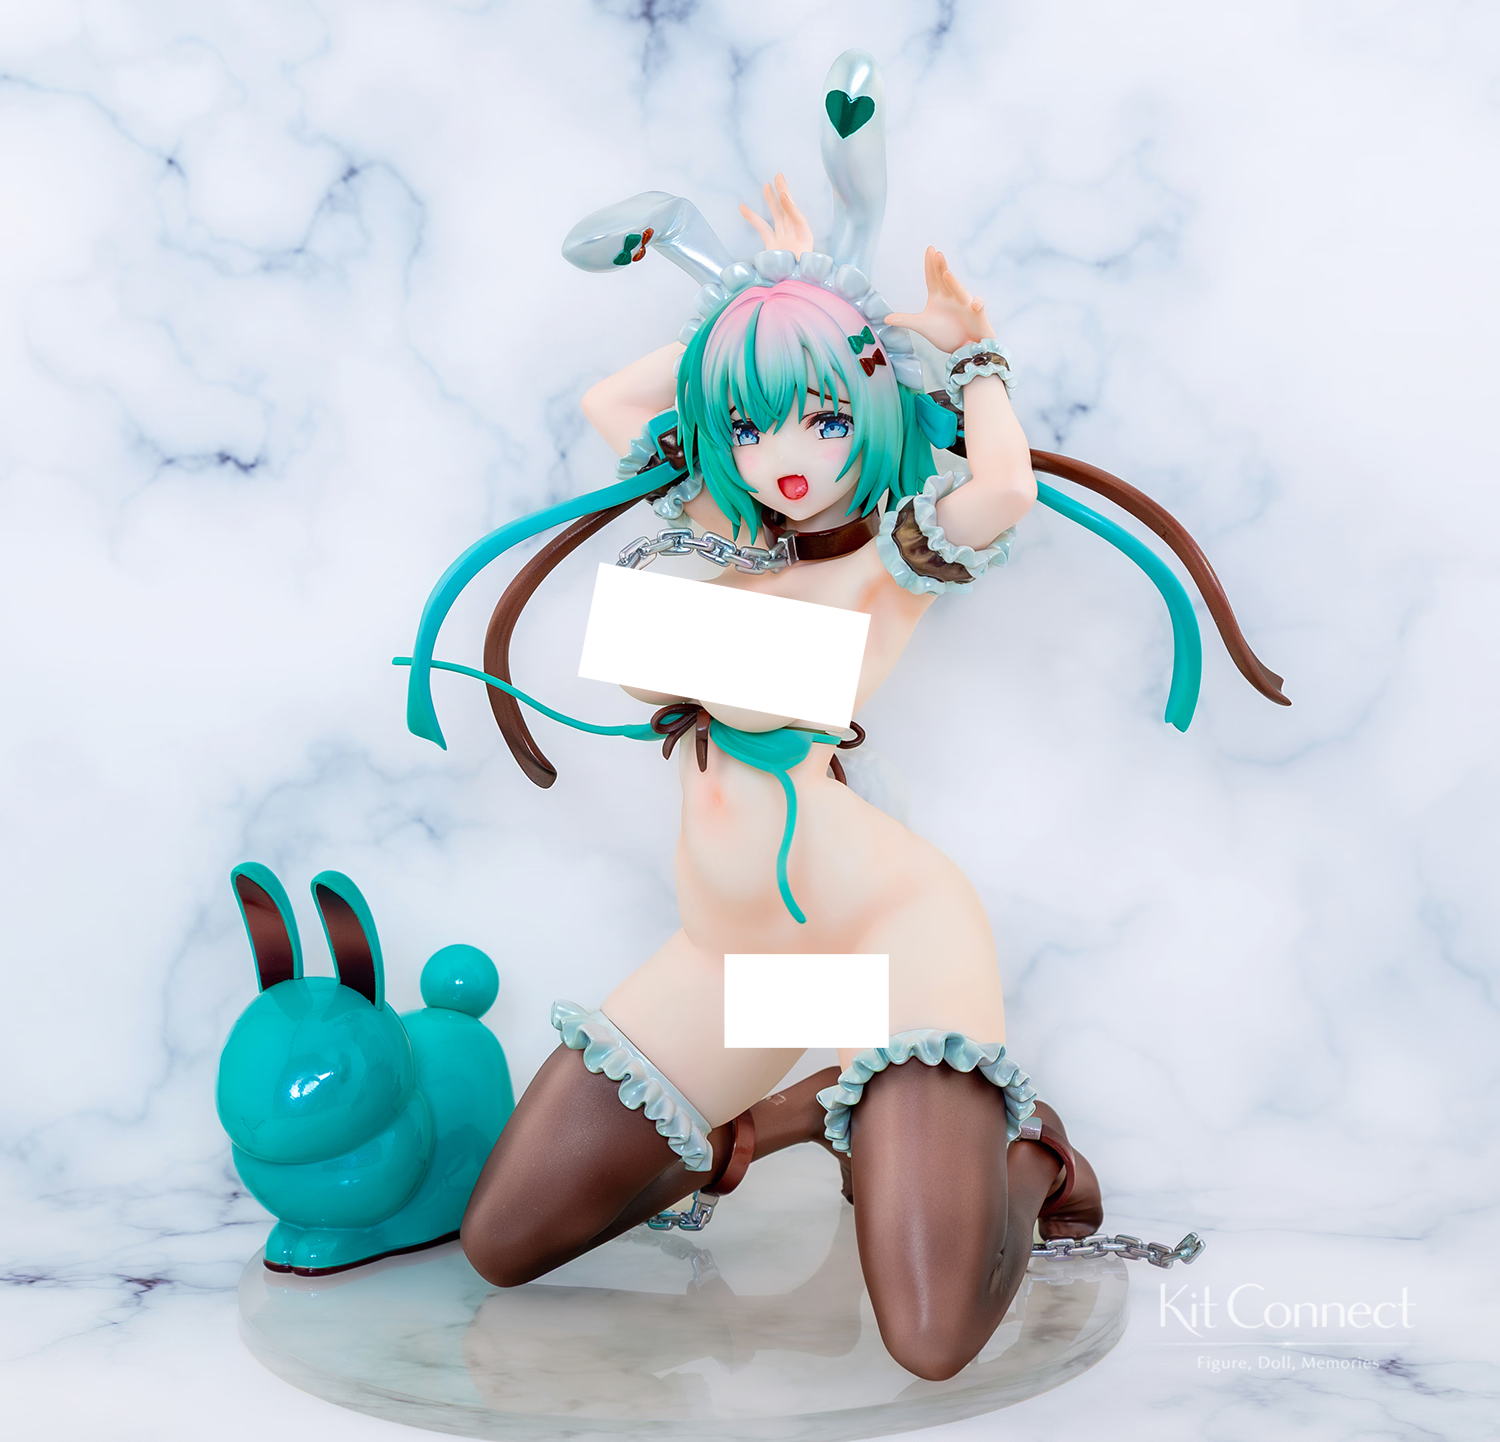
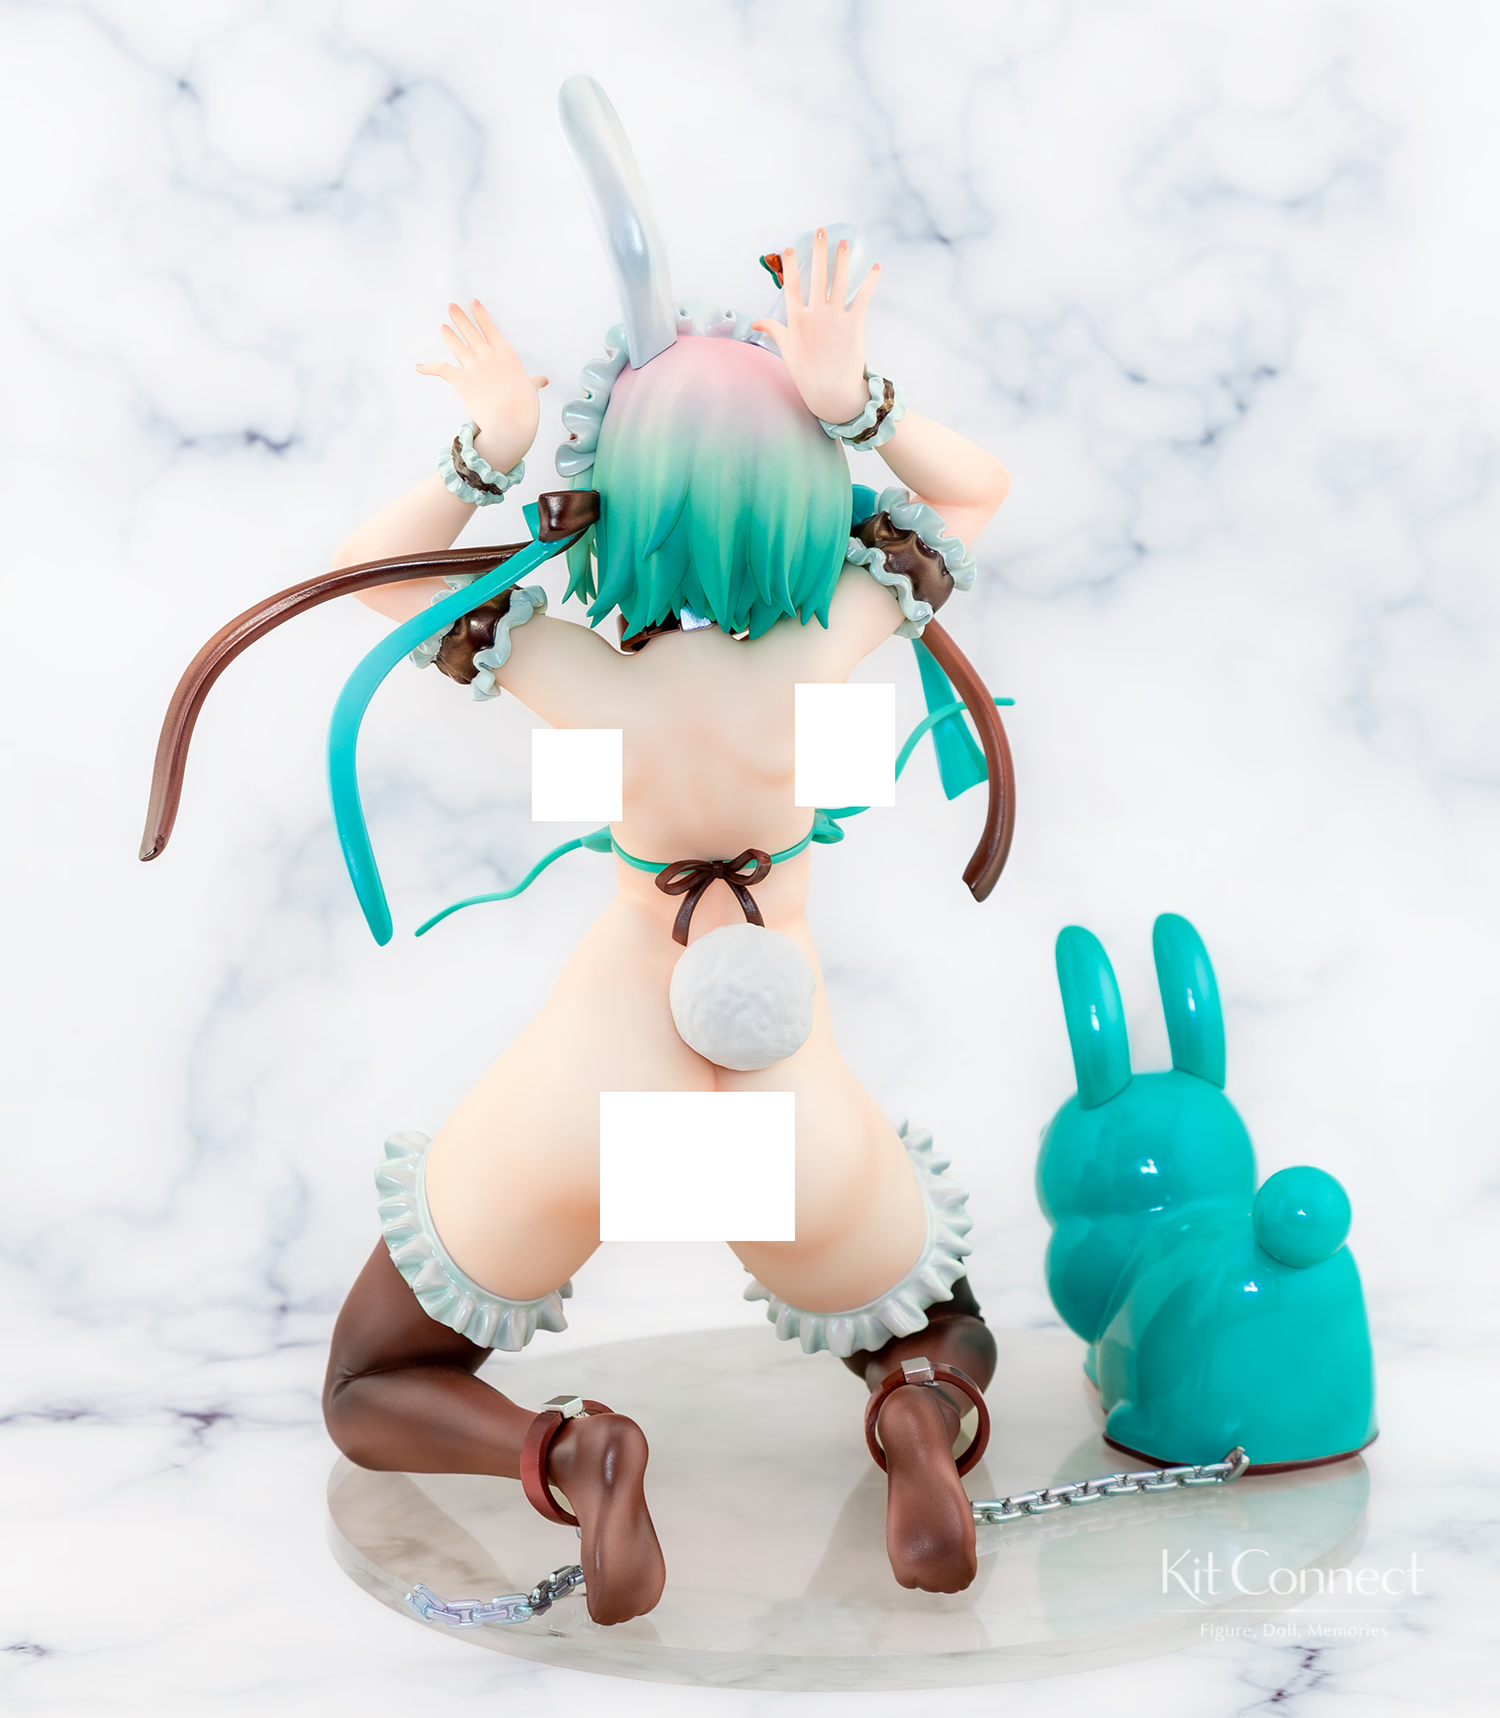
Kit Information
Dealer: Grizzly Panda
Parts: 41
The kit is called Usagino Mimomo & Miki, but it does not include two figures. They are two color variations:
Mimomo: Pink hair + Alice-style maid outfit
Miki: Blonde hair + black maid outfit
I went with my own color scheme.
Test Assembly
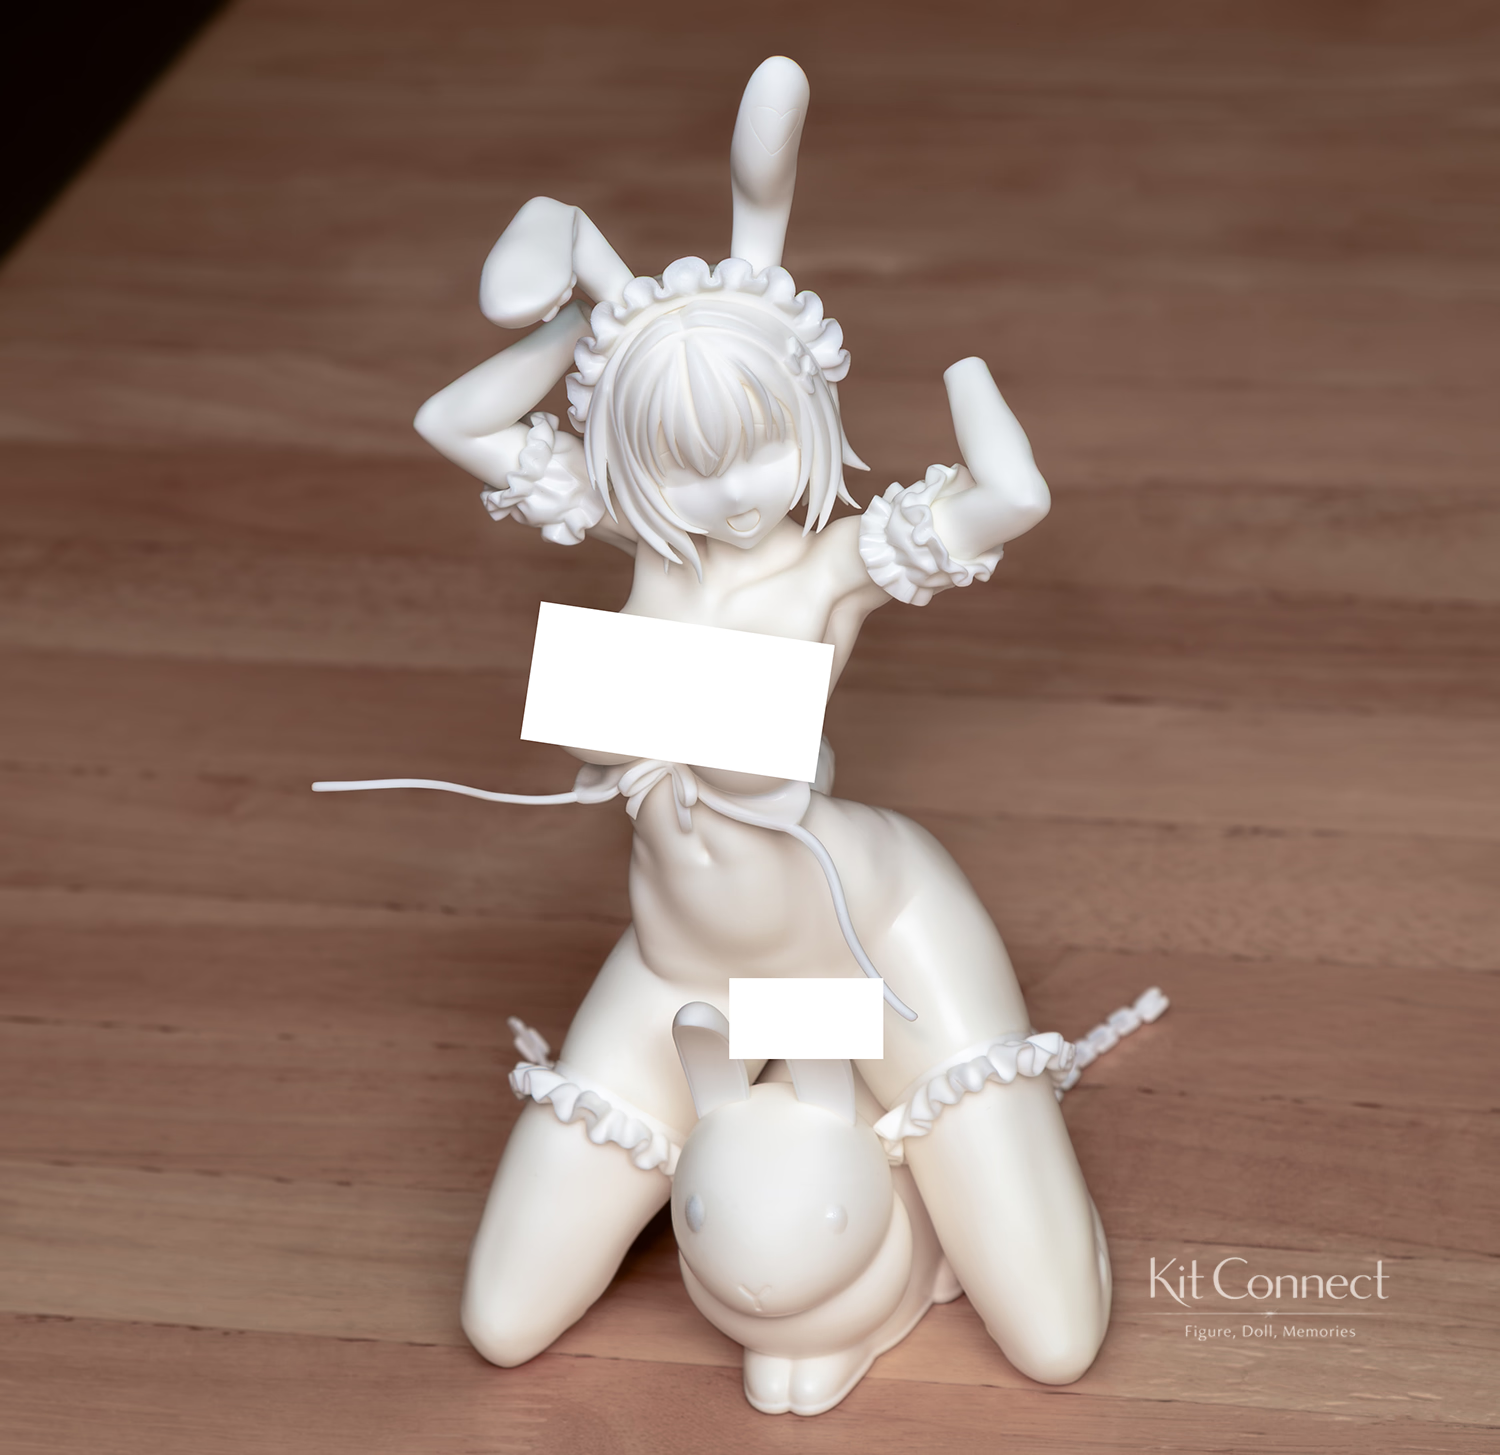
The parts fit together very easily, which was a great start.
A smooth test assembly always gives me a motivation boost.
Here, I had finished the pinning and added magnets. The wrists and hair ribbons were attached with adhesive.
Paint Testing
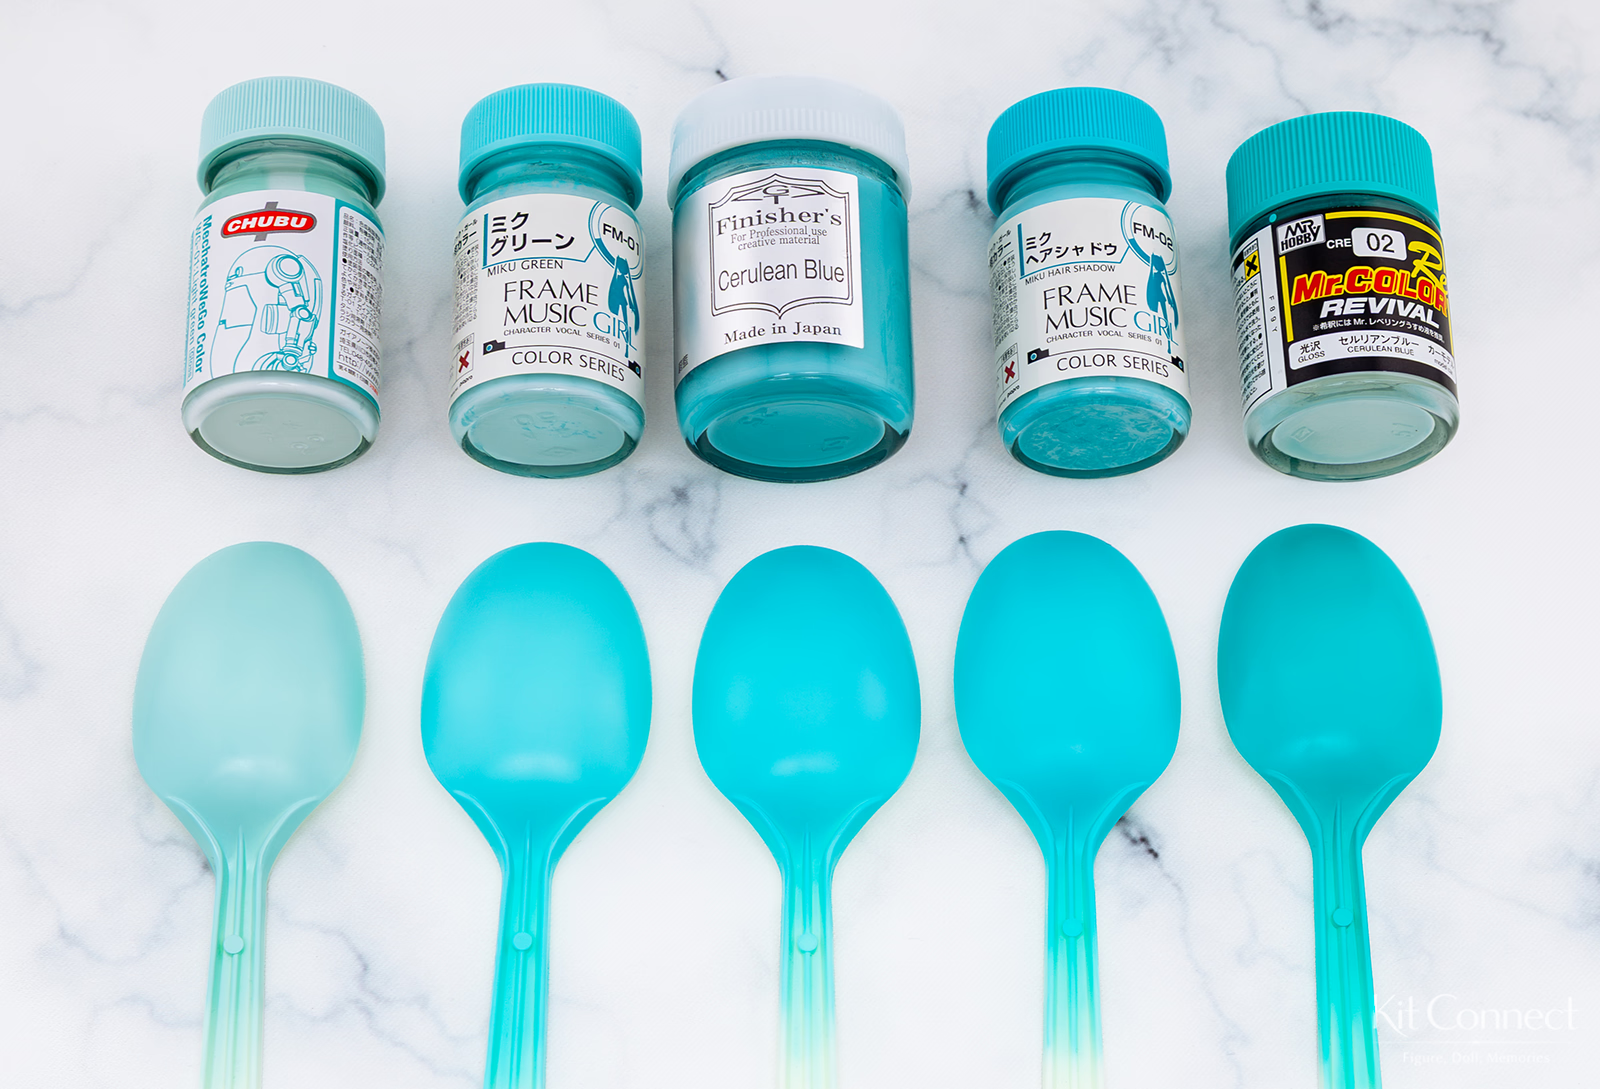
I wanted a chocolate mint color scheme! 🌿🍫
First, I tested some colors.
From left: Gaia Mechatro WeGo Usumidori, Miku Green, Finishers Cerulean Blue, Miku Hair Shadow, and Mr. Color Cerulean Blue.
Although Miku Green is called “Green,” it looks more like a light blue to me.
Usumidori felt a little too pale, so I chose Miku Green as the base.
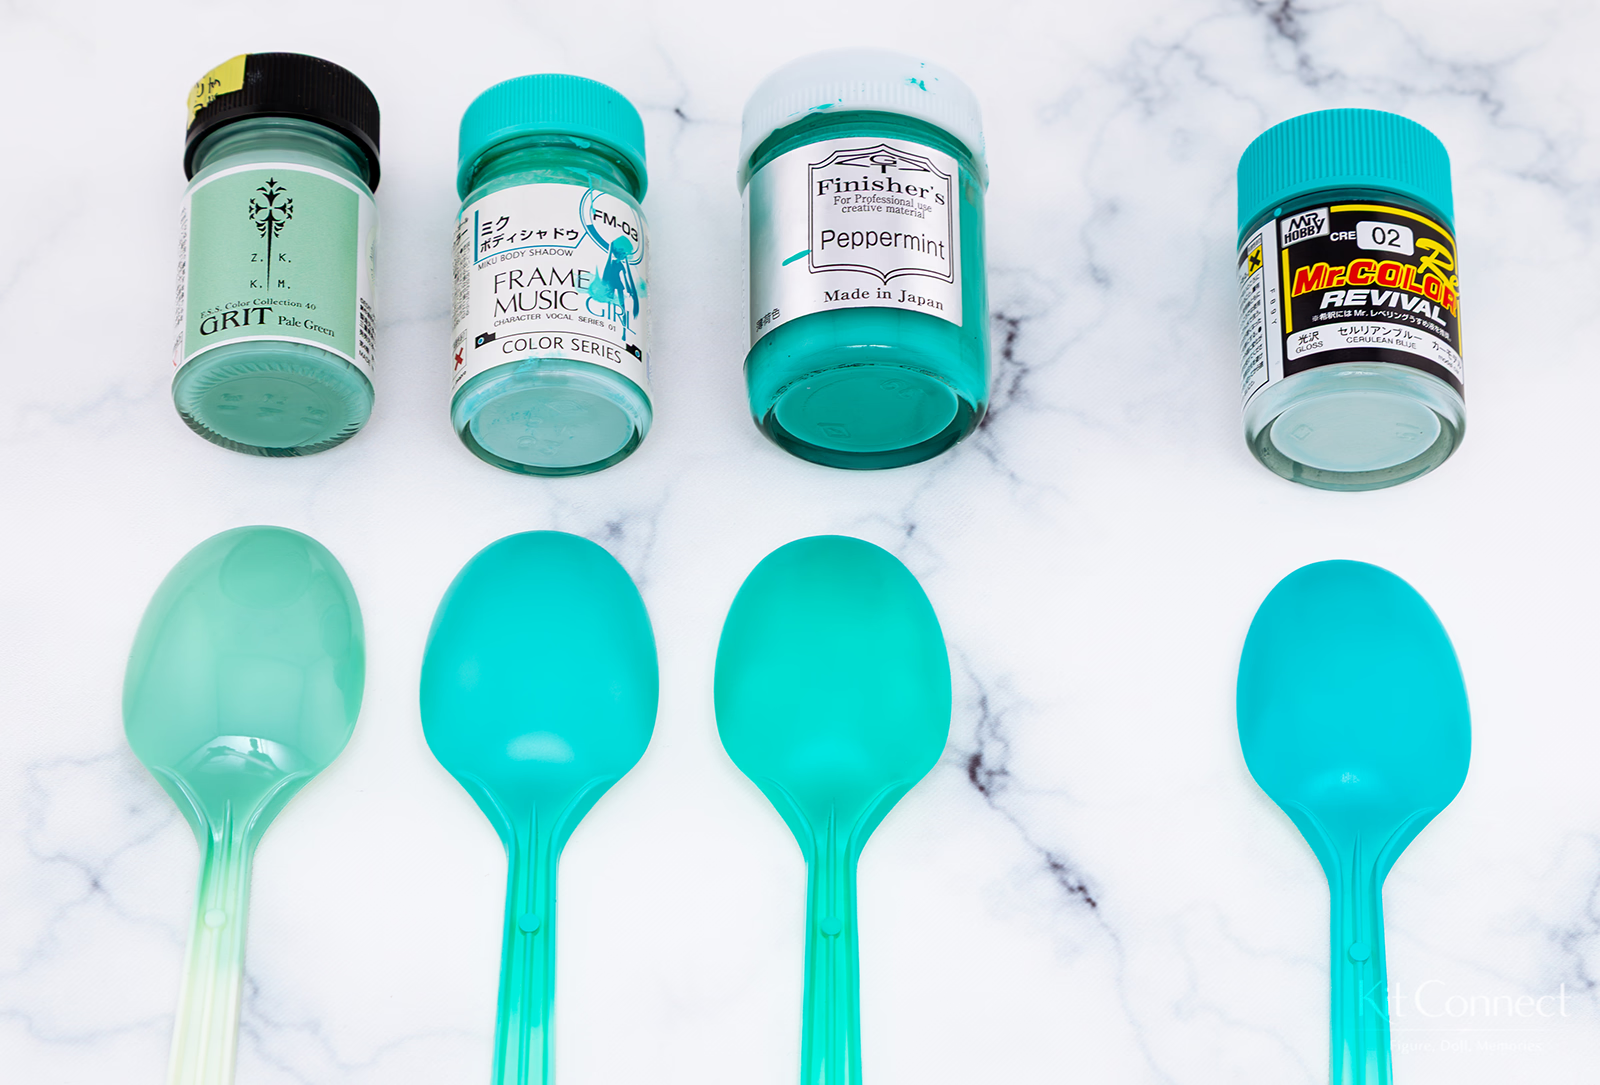
Next, I tested some greener mint colors.
From left: Volks Wakakusa Green, Miku Body Shadow, and Finishers Peppermint.
I also included Mr. Color Cerulean Blue, the bluest color from the first test that looked the most green.
For a stronger mint tone, I chose Finishers Peppermint.
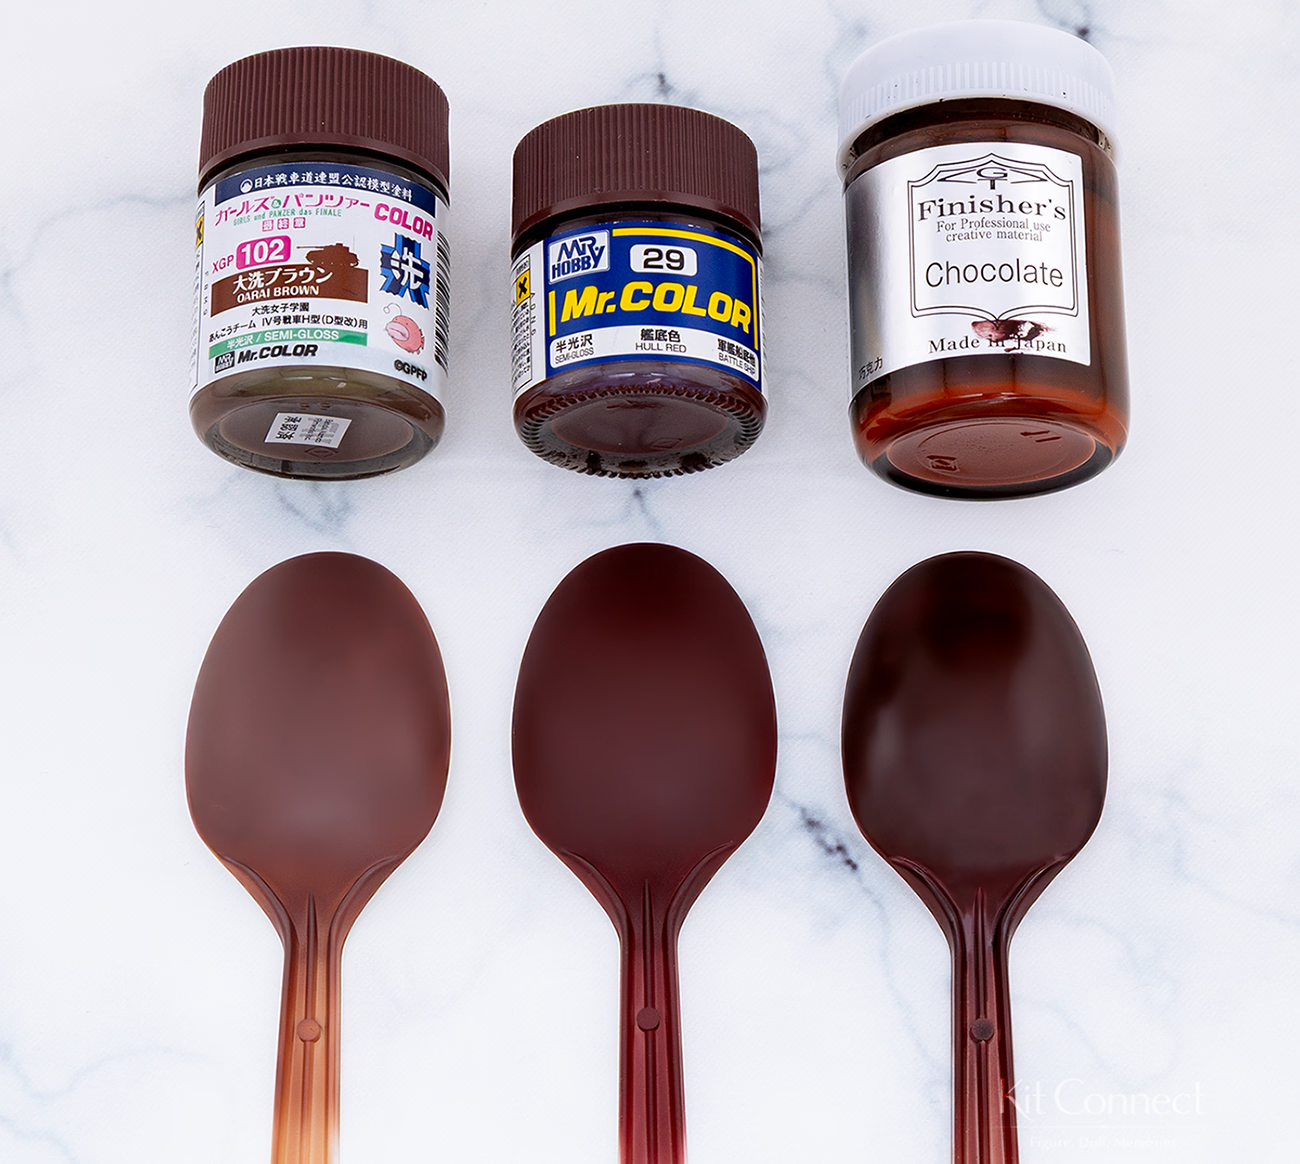
For the chocolate color, I tested Mr. Color Oarai Brown, Hull Red, and Finishers Chocolate.
I had never tried Finishers Chocolate before, and it really does look like chocolate!
I decided to use all three, with Oarai Brown as the base.
Painting
1. Legs
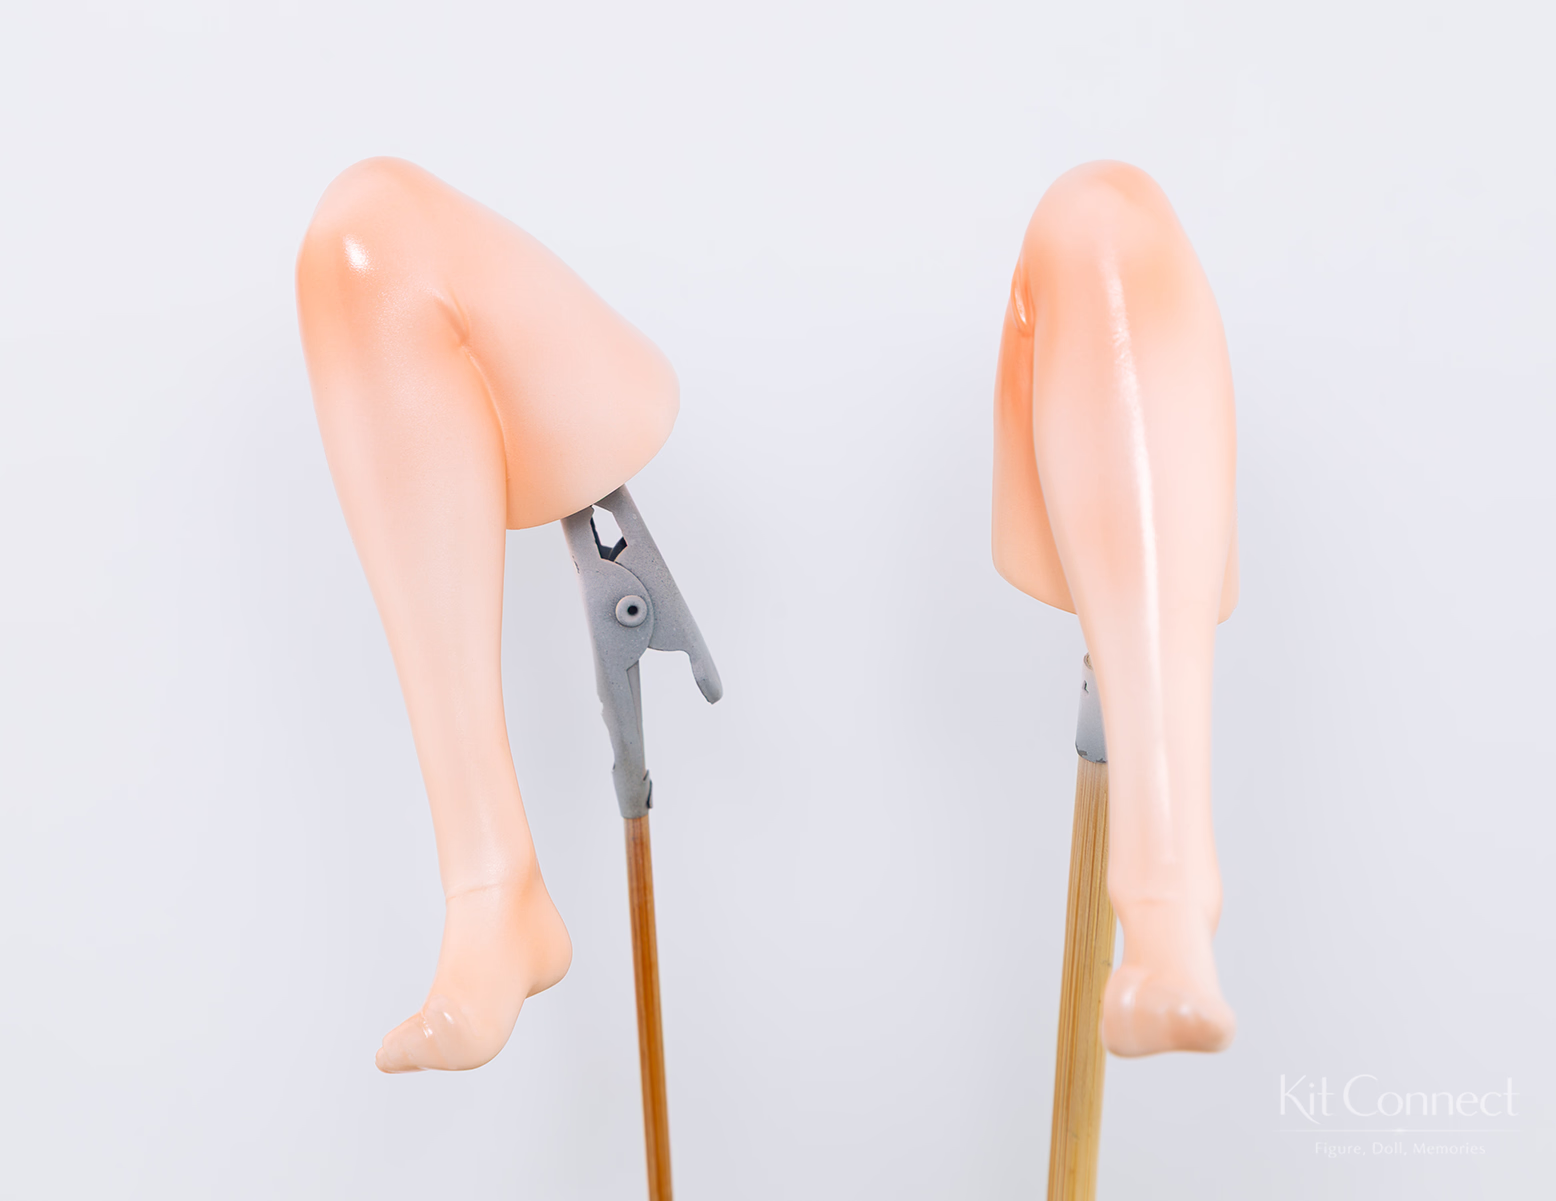
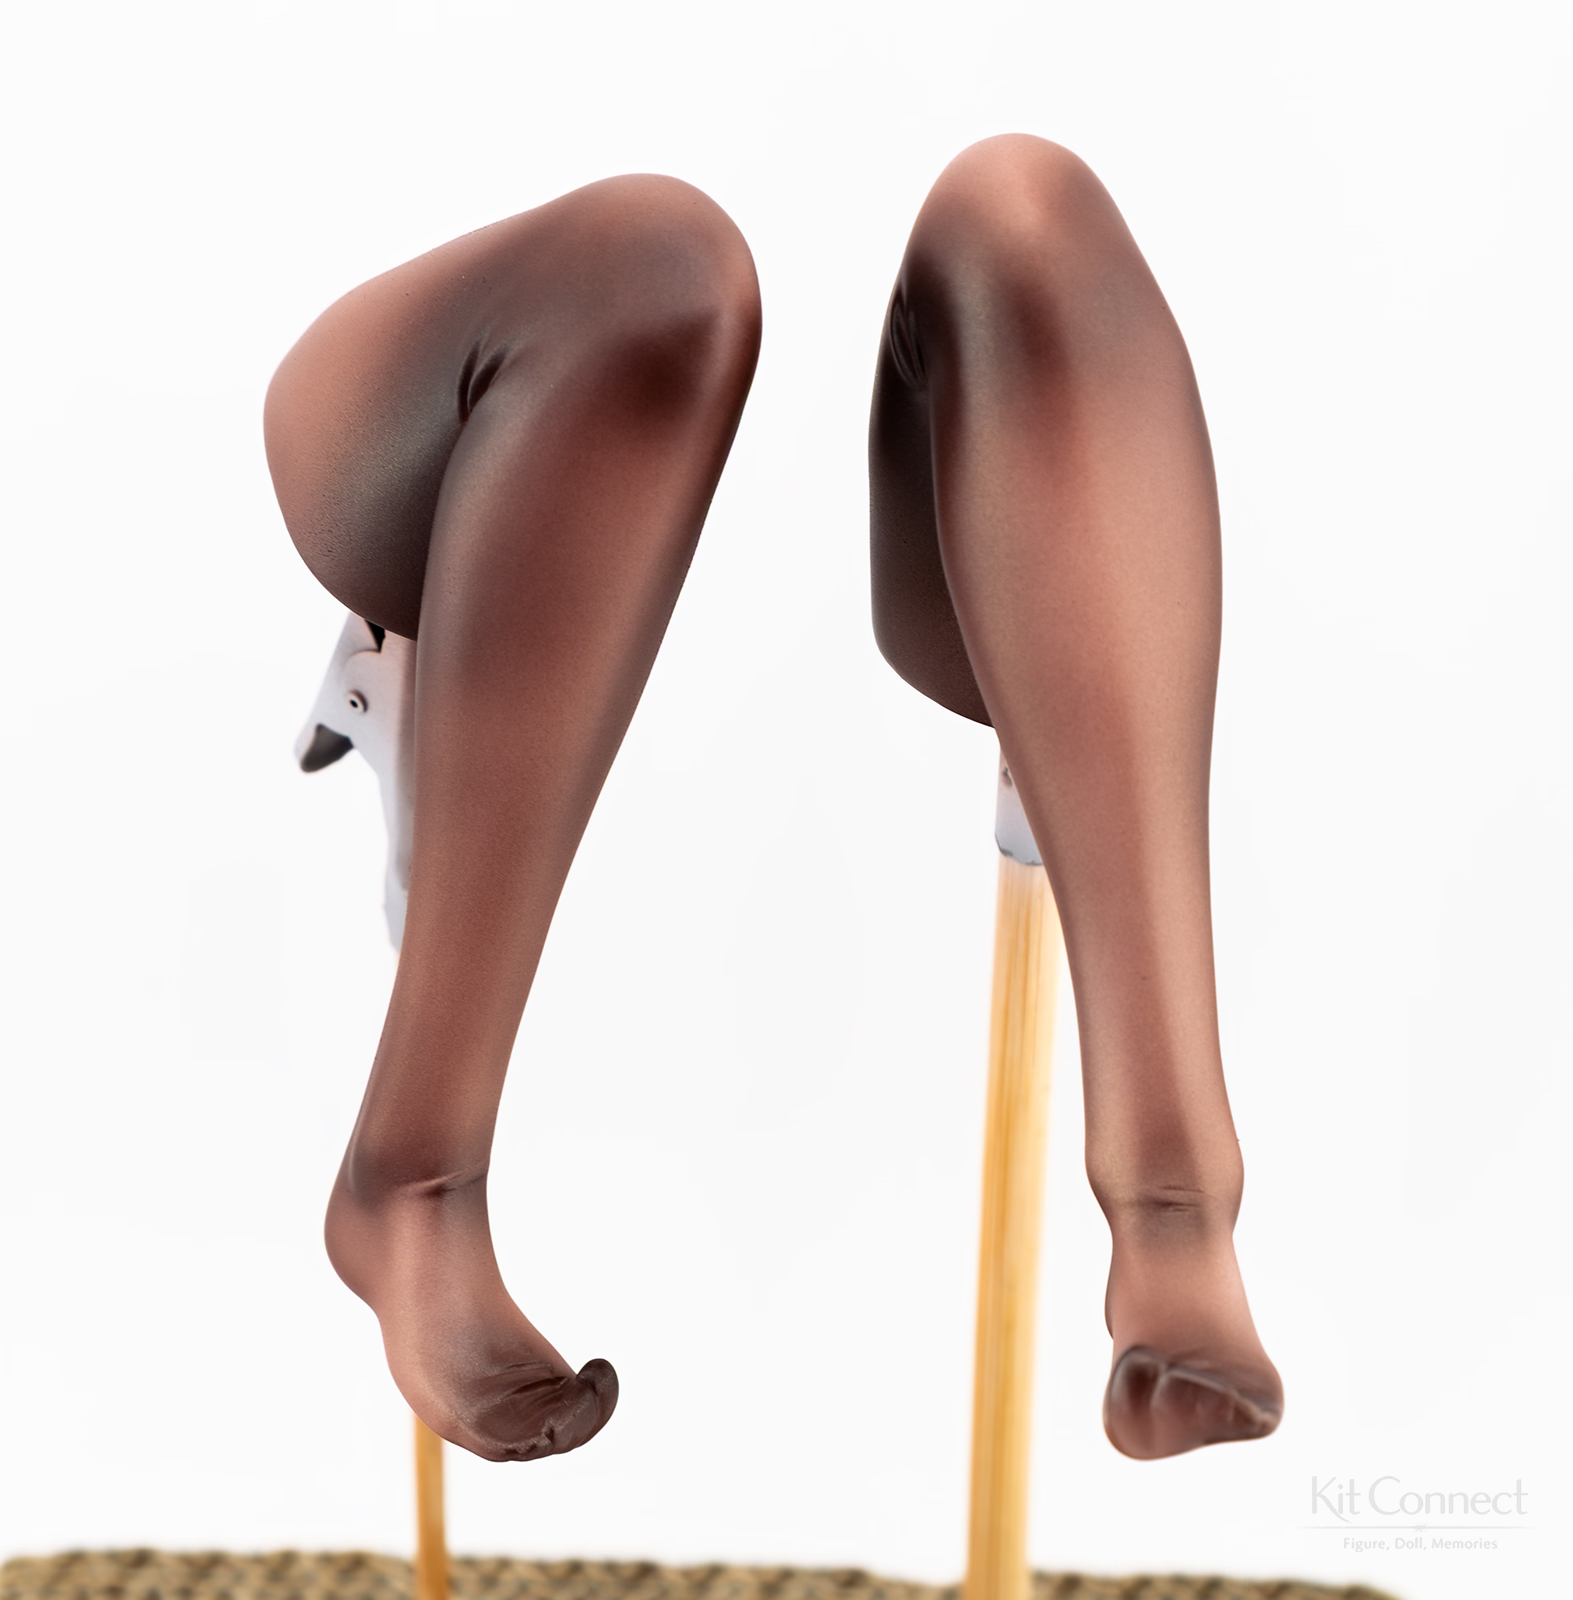
I started with white primer, followed by a slightly heavier coat of Mr. Color Surfacerless Flesh Pink.
For the stockings, I used Mr. Color Stocking Brown with a few drops of Gold Pearl Base.
I finished them with a light mist of Moonstone Pearl and Topaz Gold for a soft, slightly satin-like look.
2. Skin
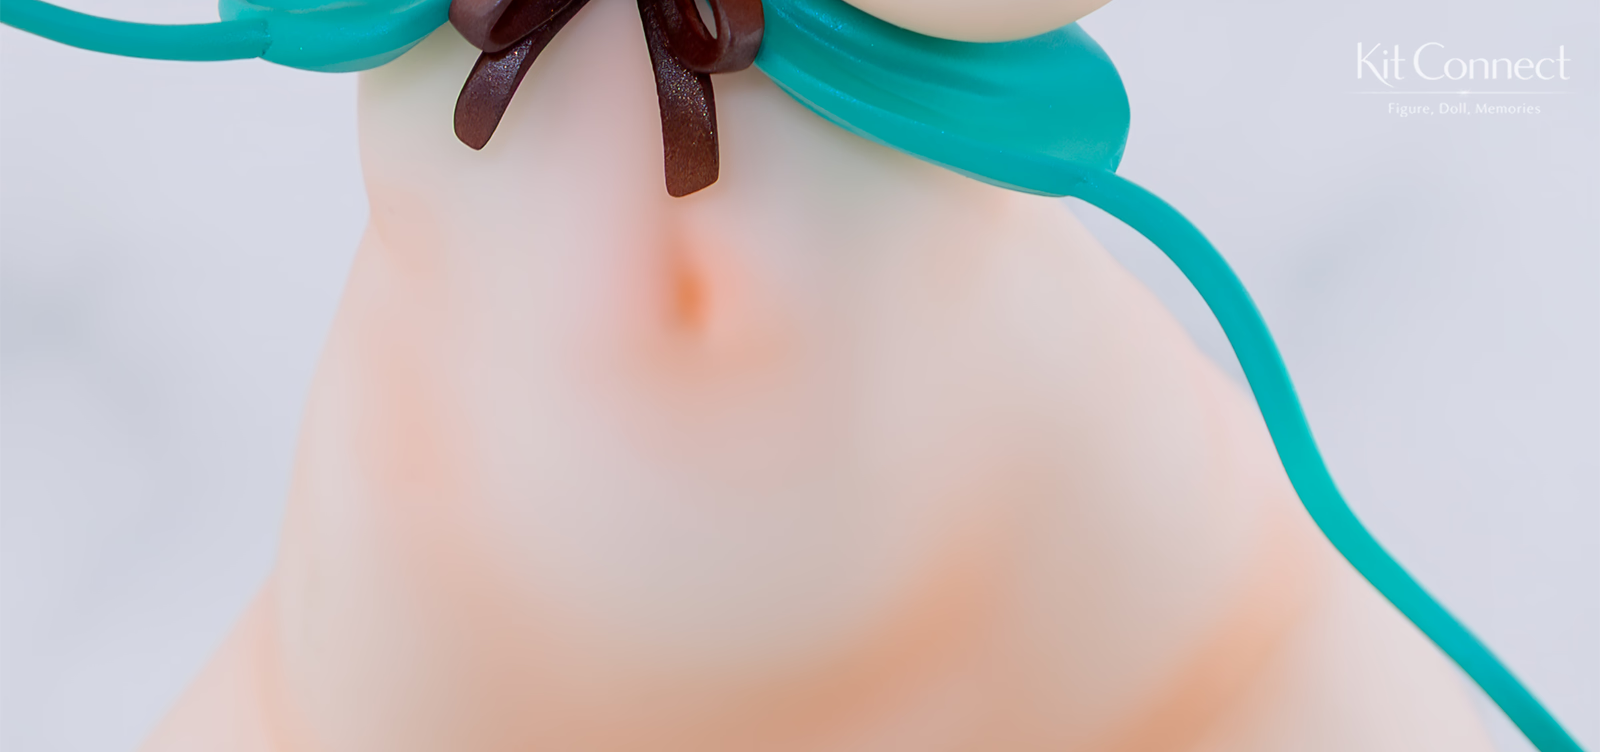
The sculpting is so good that the body already looked beautifully shaped with a fairly simple paint job.
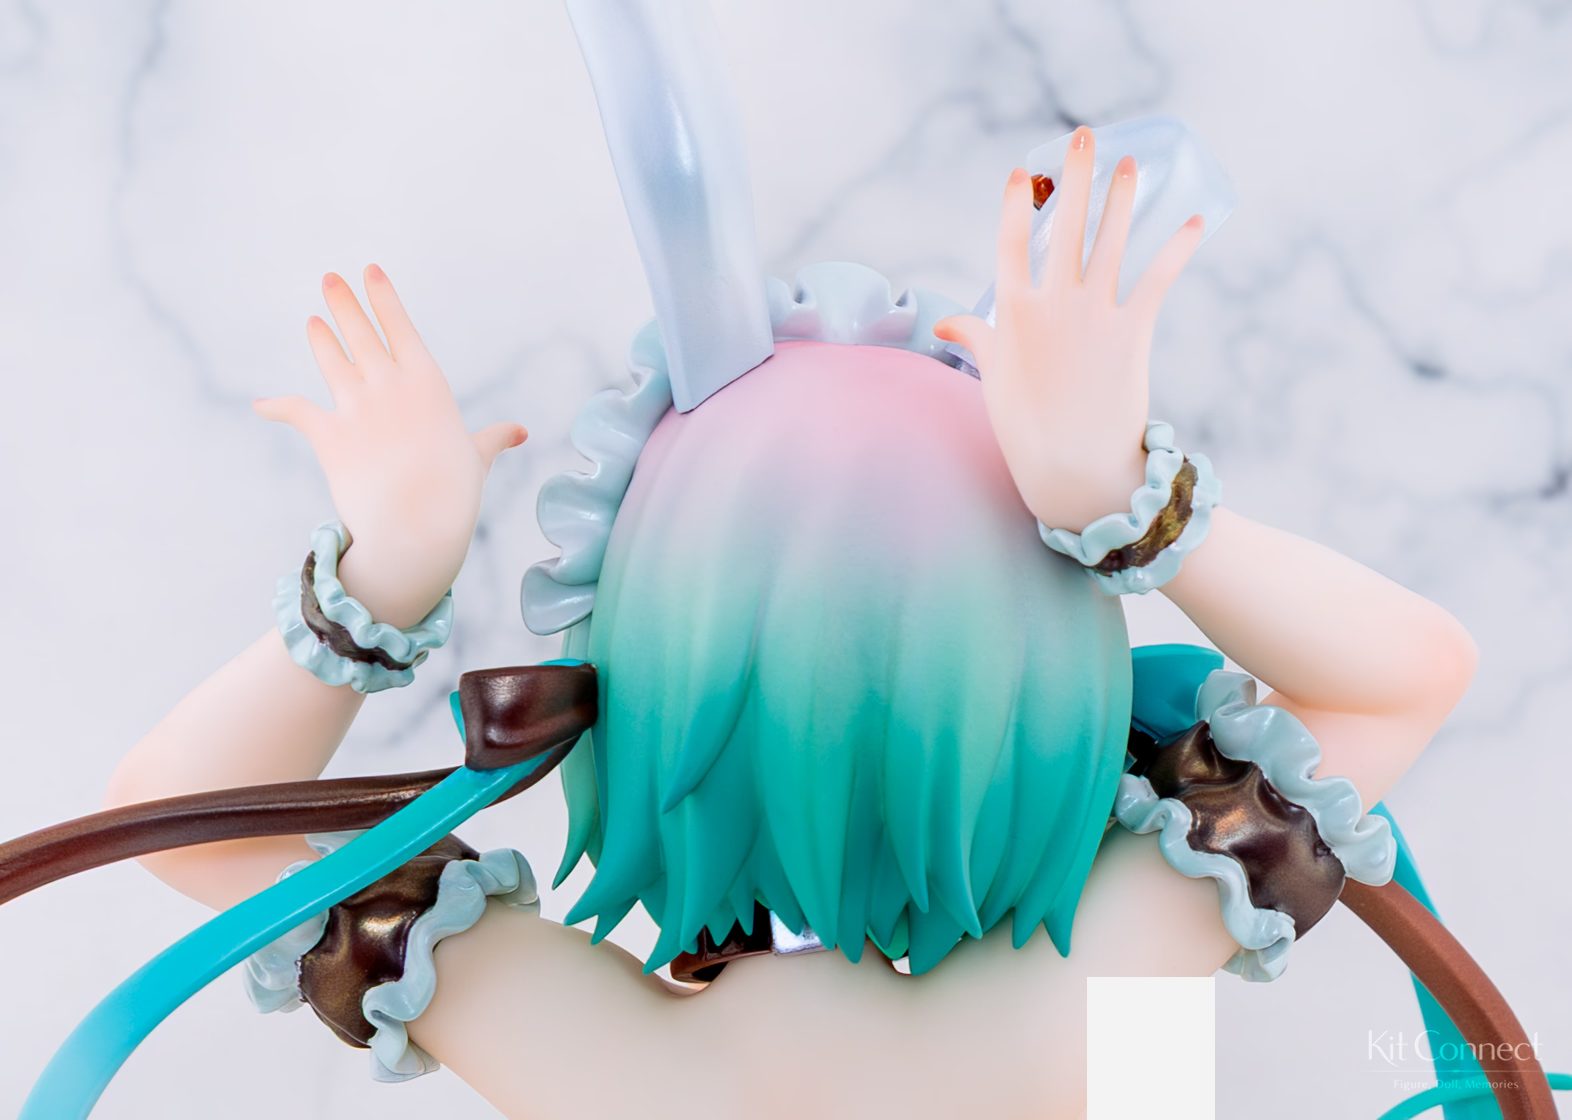
The hands look like this from the back.
Painting hands naturally is surprisingly difficult! I want to spend a little more time on them next time.
3. Hair
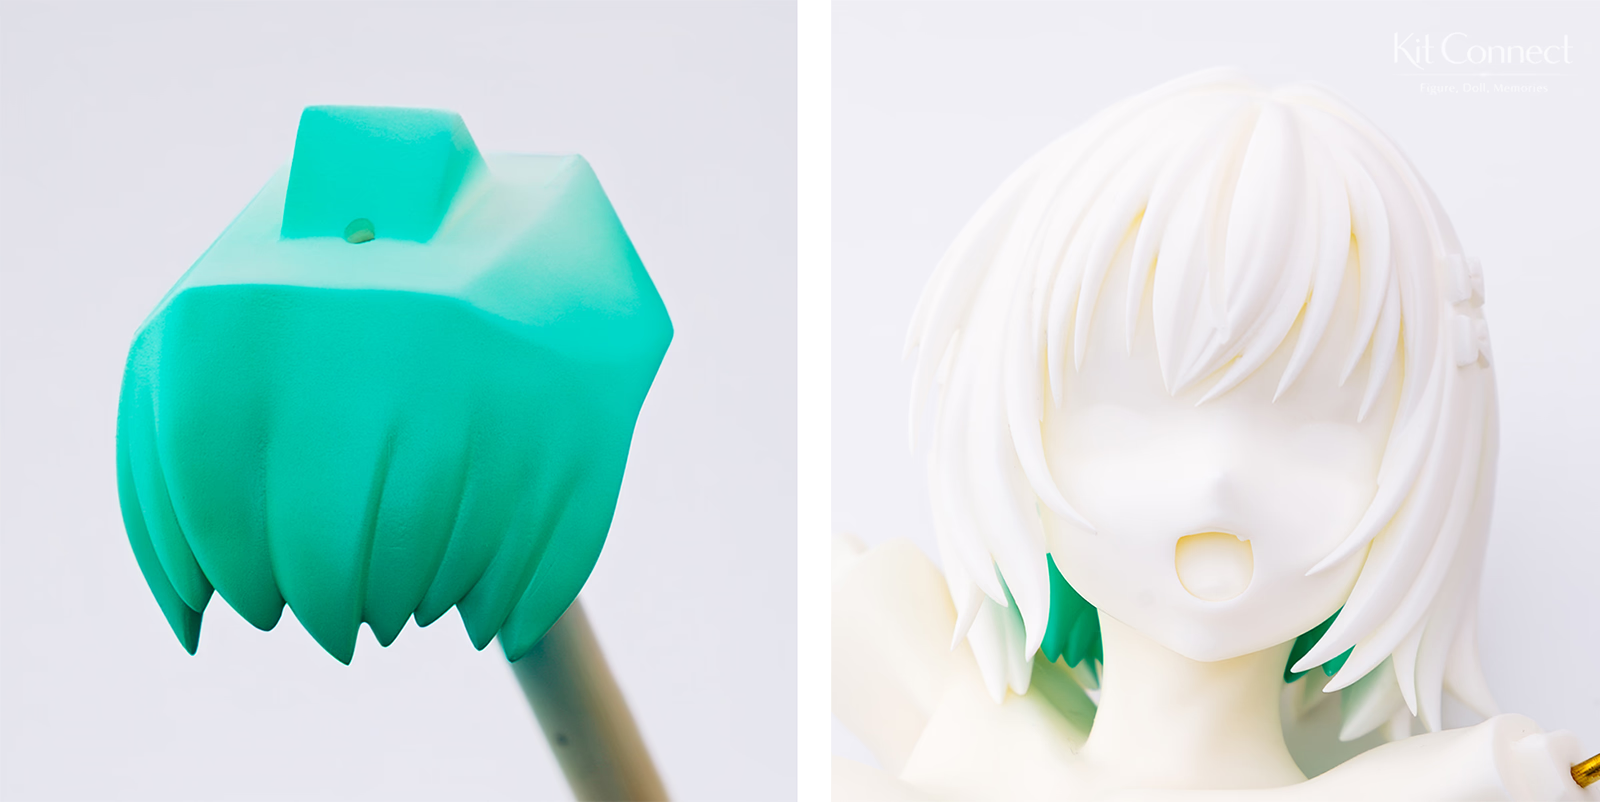
I first painted the inner hair color and checked how much of it would be visible.
I used this color as the endpoint of the hair gradient, then painted the front and back sections to match.
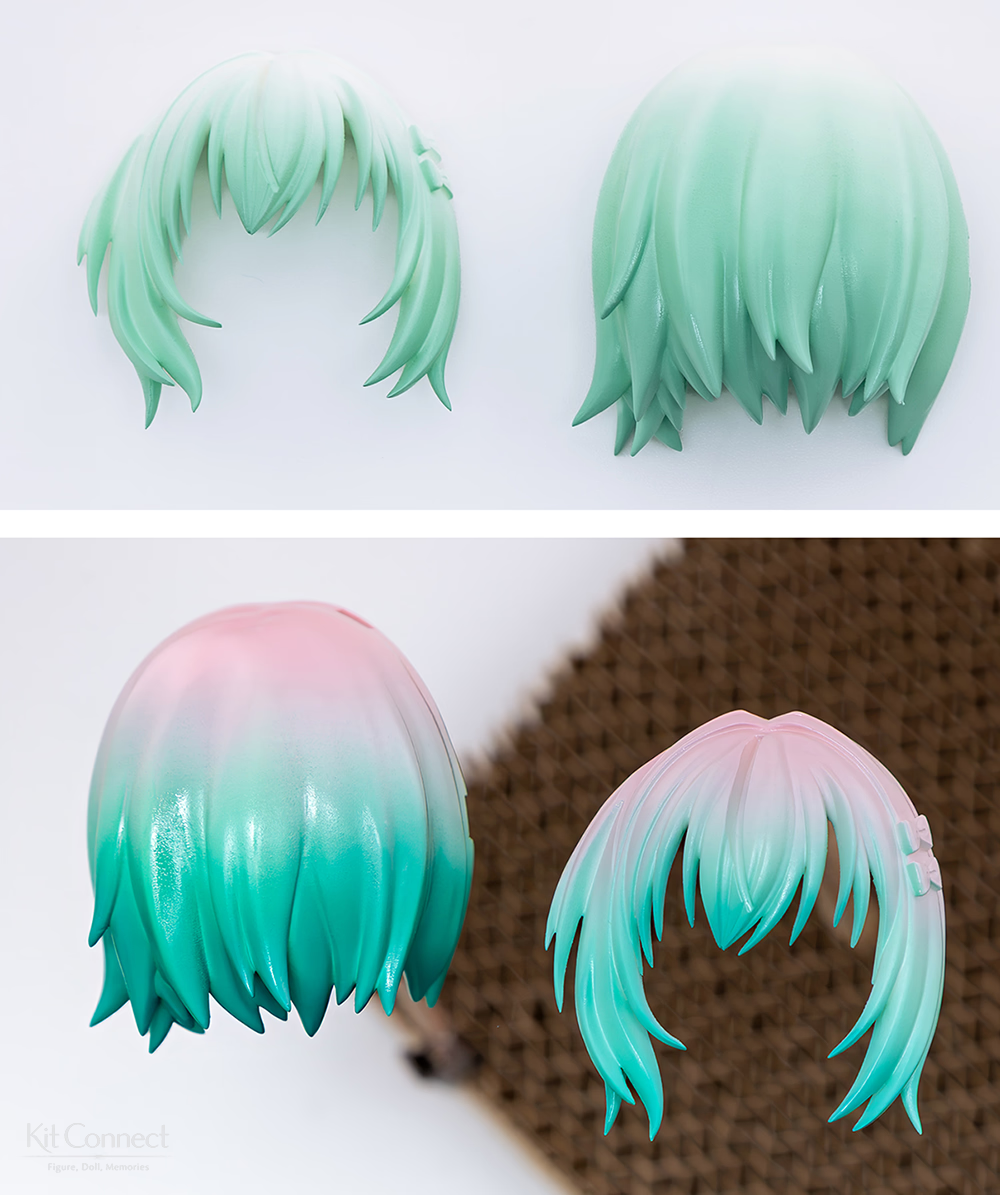
For the base, I used Volks Wakakusa Green.
I added Volks Sakura Pink from the top of the head, then layered Mint Green toward the tips.
After a coat of Super Smooth Clear, the colors became a little softer and more subdued.
4. Clothes & Accessories
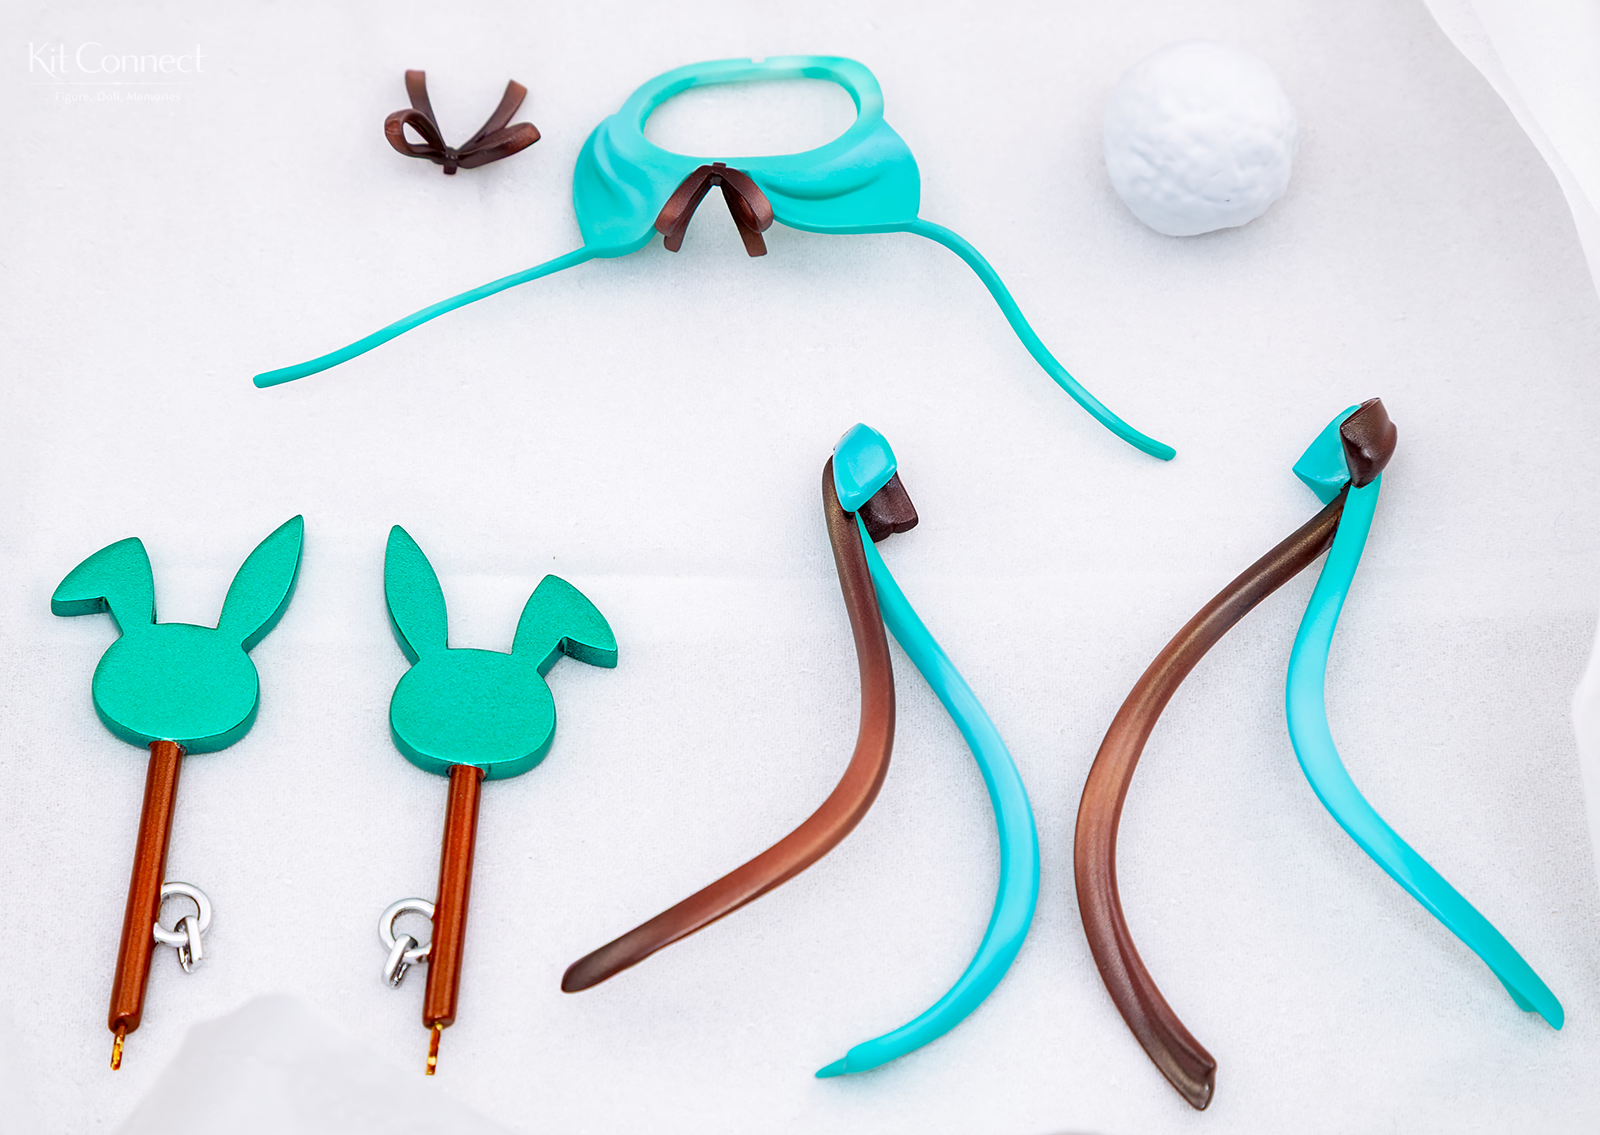
Bra:
Miku Body Shadow as the base, with Finishers Peppermint added to the shadow areas.
Mint ribbons:
Finishers Cerulean Blue as the base, with Peppermint added near both ends.
Chocolate-colored ribbons:
Oarai Brown as the base, with Finishers Chocolate added near both ends.
I wanted a two-tone ribbon effect, so I masked the colors separately. Unfortunately, the boundary ended up a little uneven.
Definitely something to improve next time. 😓
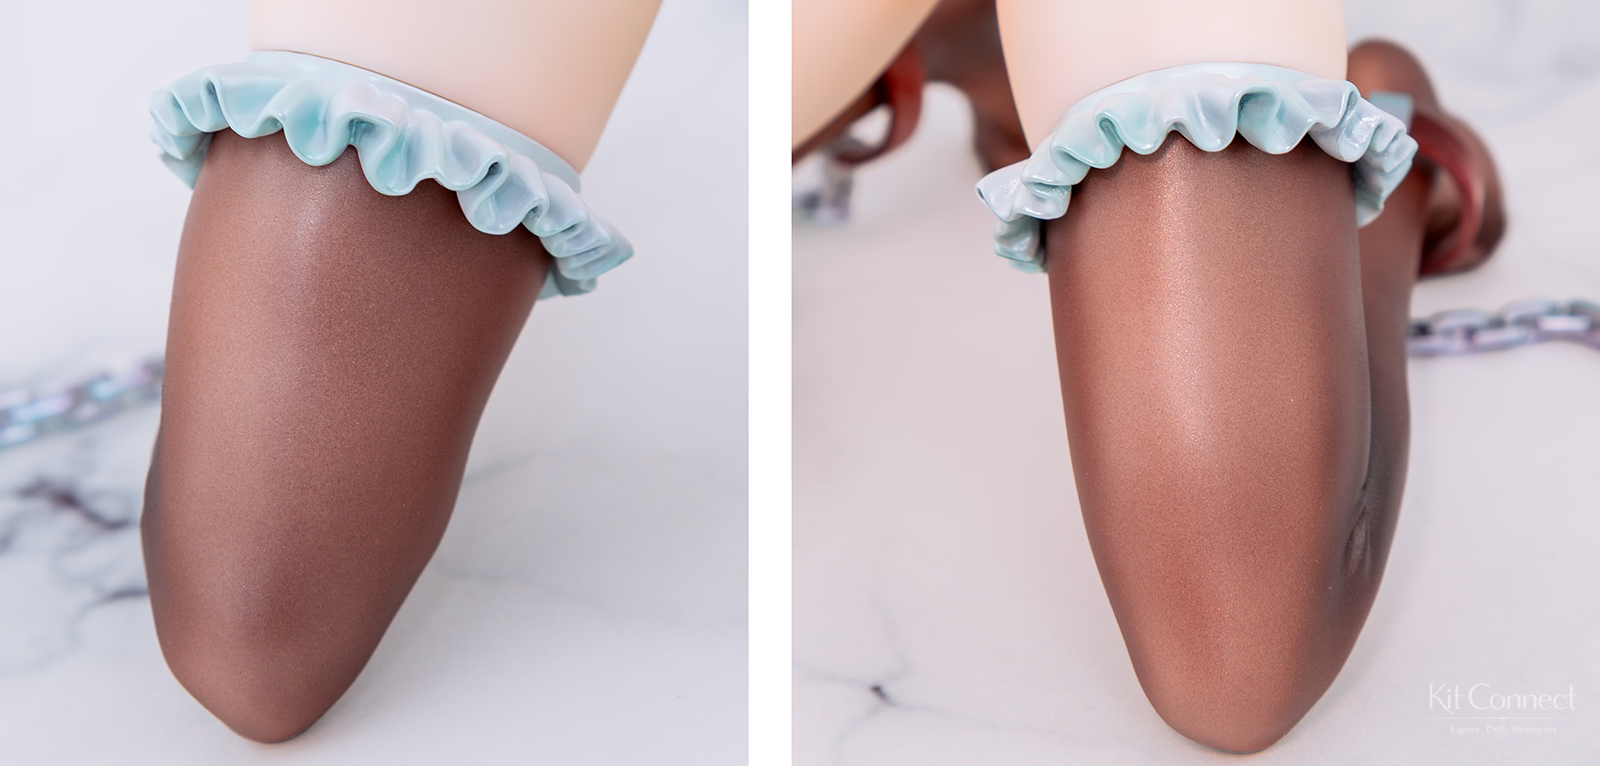
For the frills on the arms, legs, and head, I carved and polished the inner surfaces with a round file.
However, the original sculpting was already so good that the difference was quite subtle.
The bigger problem was the paint. The delicate frills ended up looking too flat, especially on the arms.
The frills are definitely my biggest lesson from this build. 😵
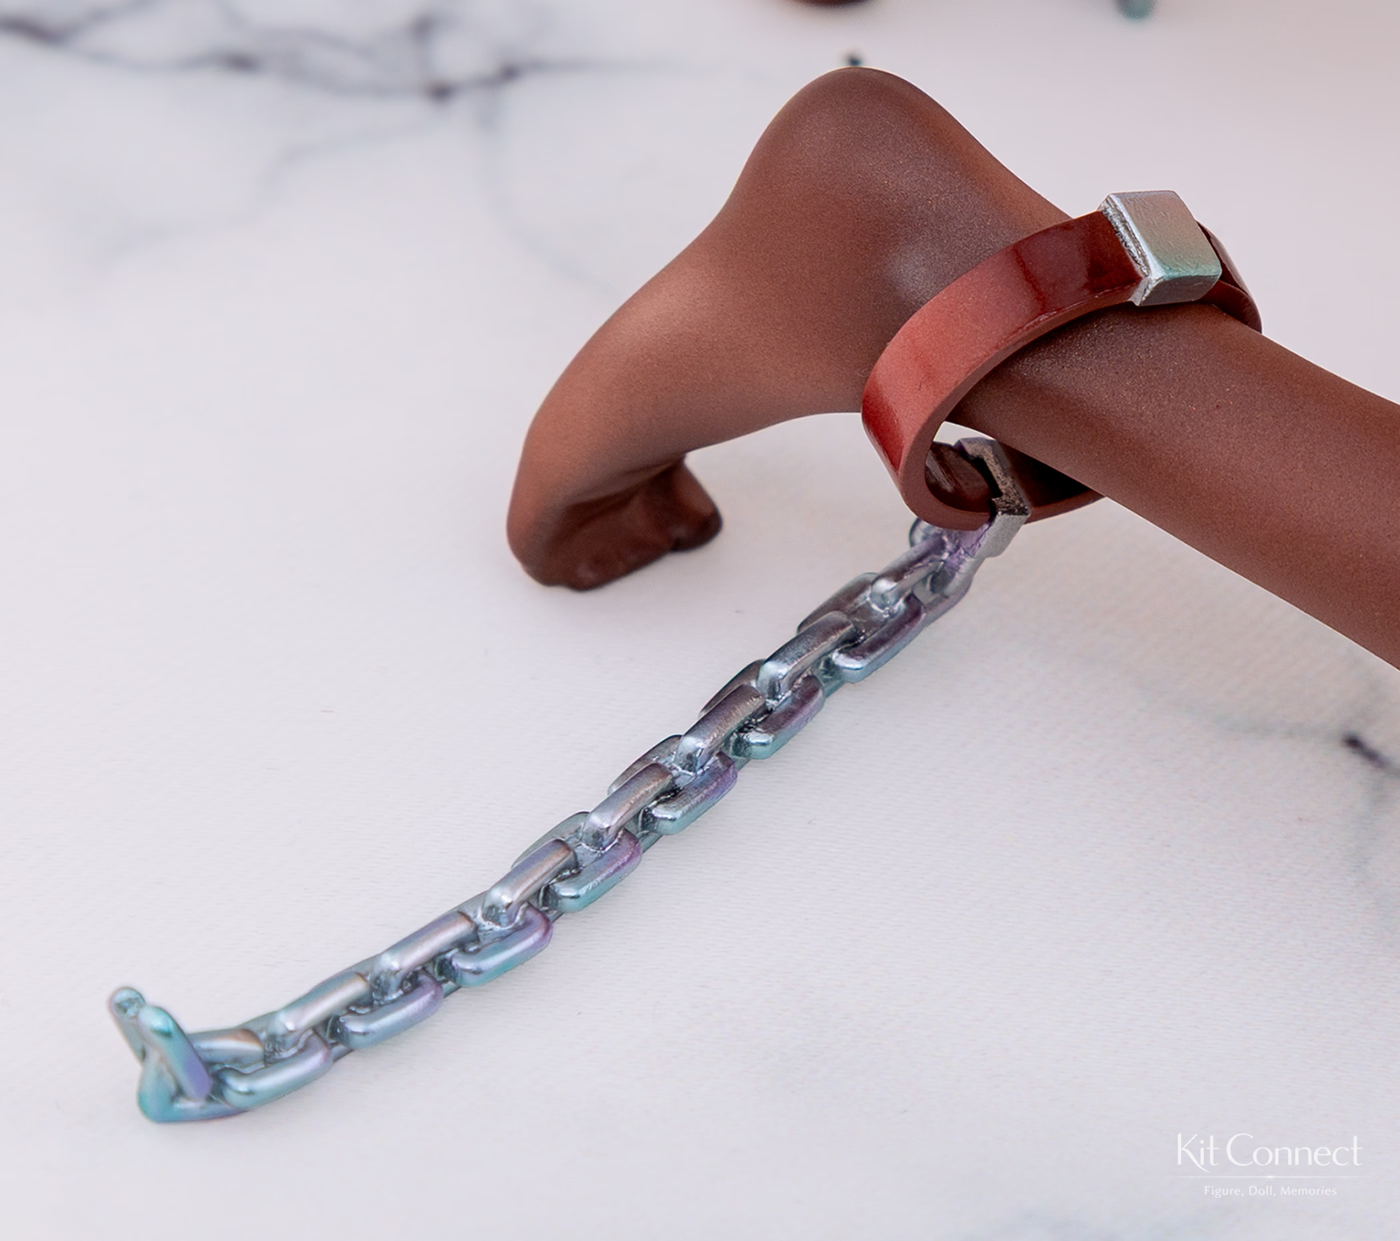
I added a very subtle touch of Clear Purple and Mint to the chains around the neck and legs.
You can see it in the close-up photos, but it is almost invisible to the naked eye. I probably could have made it a little stronger.
5. Display base
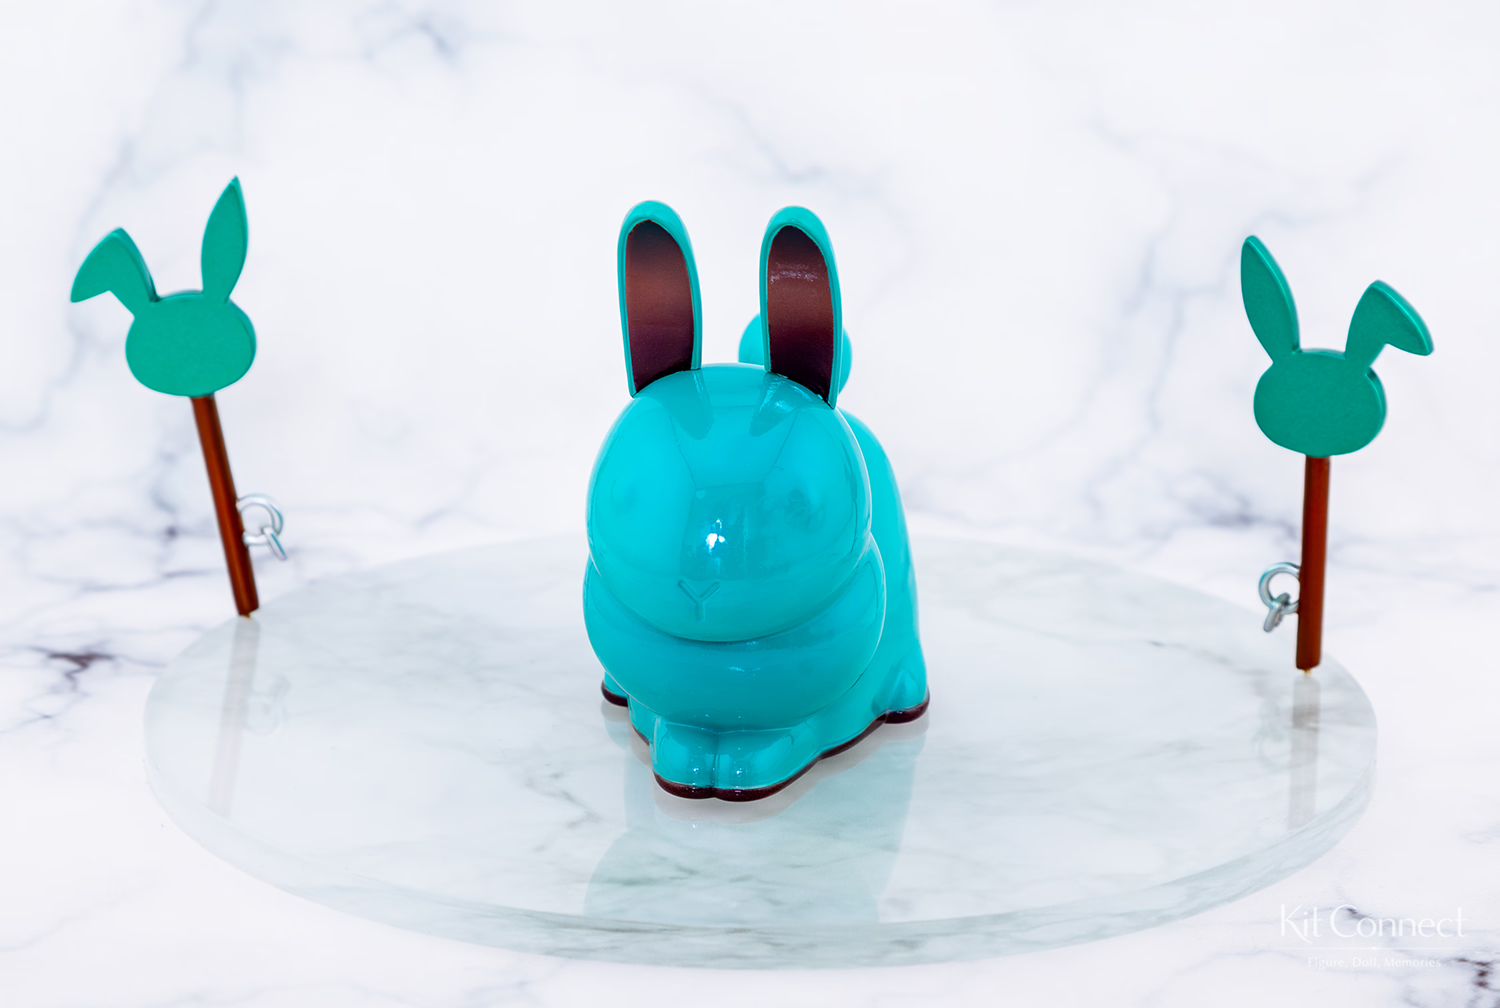
This is the finished display base.
For the little rabbit vehicle, I dropped some CA glue onto the surface to create small raised bumps for the eyes.
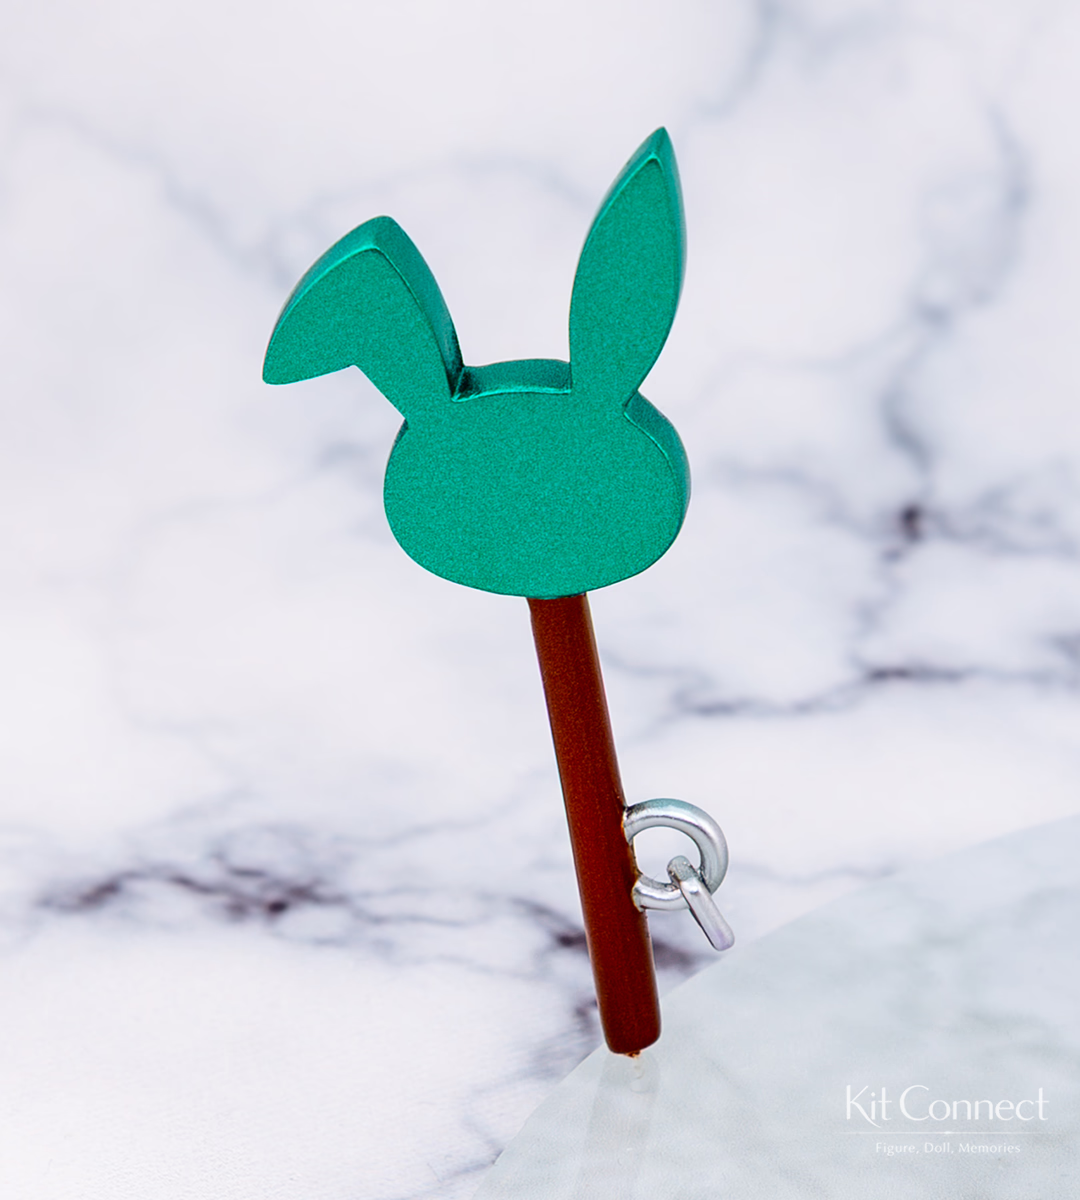
The rabbit stake was painted with GX Metallic Green, and the pole with Victory Brown Gold.
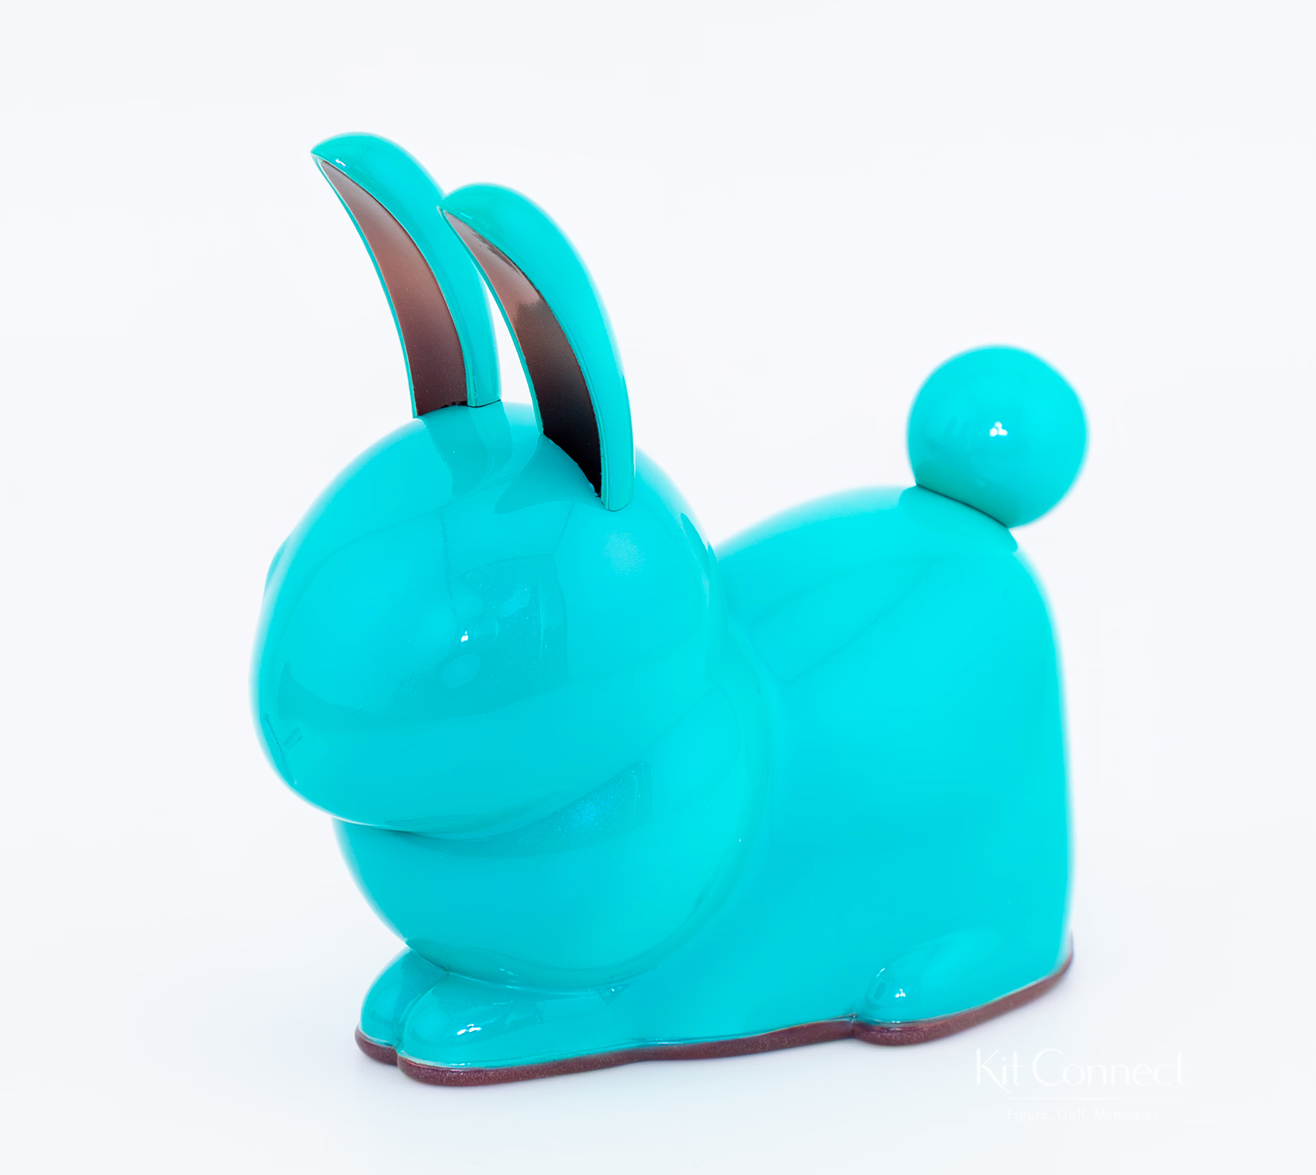
The rabbit itself was painted with Mr. Color Cerulean Blue.
For the inside of the ears, I used Hull Red as the base and added Finishers Chocolate.
Finally, I gave everything several heavy coats of Mr. Color spray clear over EX Clear.
A Beautiful Sculpt Made This Easy
This was such a fun build!
The biggest thing I noticed was how easy the kit was to assemble and paint. The sculpt is so good that even a fairly simple paint job looks great.
That beautiful sculpting helped me enormously throughout the process.
It was the kind of kit that made me feel like I was doing a better job than I actually was—and that made the whole experience incredibly motivating.
By the way, Usagino Mimomo is an original kit and is still available from Grizzly Panda’s BOOTH as of August 2026.
If this post makes you think, “Maybe I could build one too,” I couldn’t be happier.
Come join me and become part of the Usano sisters club! 🐰
Next time, I’ll write about Panda Festival 4, where I brought Mimomo with me. It will probably be half event report, half travel diary.
Thank you!